How to Install Fireplace Insert in TV Stand
Affiliate links — we may earn a commission
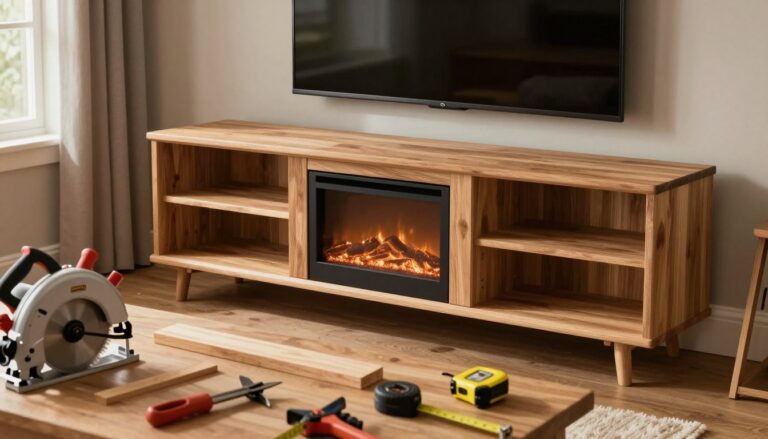
I remember the exact moment I fell in love with the idea. It was a cold February evening. I was scrolling through Pinterest while wrapped in two blankets because my living room felt like a walk-in freezer. My eyes landed on a gorgeous entertainment center with a glowing electric fireplace tucked right inside it. My heart said yes before my brain could even process the thought.
That single image sent me down a rabbit hole of learning how to install fireplace insert in TV stand setups. I spent weeks researching, measuring, and second-guessing myself. Was it safe? Would it ruin my furniture? Could someone with my limited handyman skills actually pull this off? Spoiler alert — I did it, and my living room has never looked better.
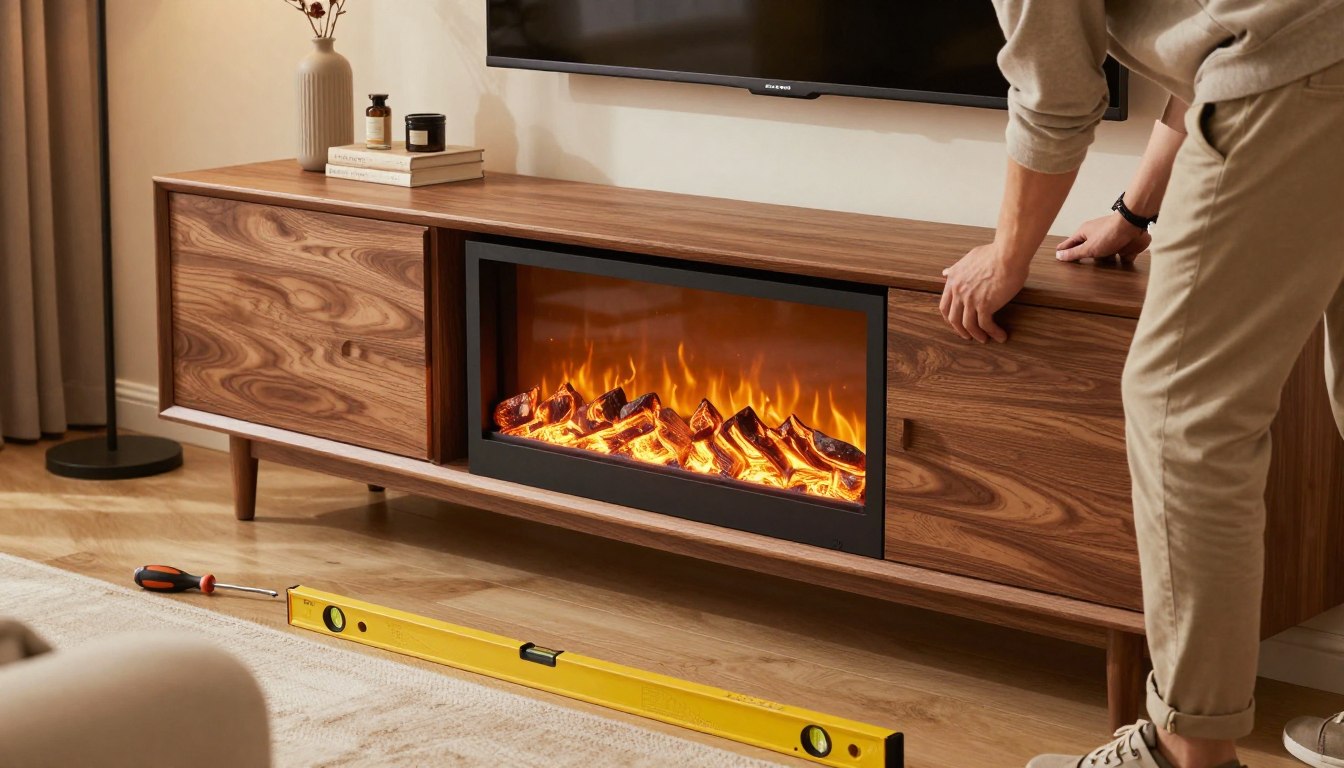
Electric fireplace insert installation is one of those projects that sounds intimidating but is surprizingly doable. These units from brands like Dimplex and ClassicFlame slide right into TV stands, sideboards, and bookshelves. They release heat through side and front vents without scorching your furniture or your flat-screen above. The surfaces stay cool to the touch, which means kids and pets are safe around them.
No smoke. No ash. No harmful gases floating through your home. Just clean, cozy warmth and a flickering flame effect that make every Netflix session feel like a luxury retreat. A DIY fireplace installation like this adds both ambiance and real heat to any room — without the mess of a traditional fireplace.
The trick is getting the dimensions right, making sure your stand can handle the weight, and doing a few structural tweaks if needed. I learned some of these lessons the hard way so you don’t have to. This guide walks you through every step, from measuring your opening to plugging in and enjoying your first fire-free fire.
Key Takeaways
- Accurate measurements of your TV stand opening is critical before purchasing an electric fireplace insert.
- Electric fireplace inserts produce no smoke, ash, or harmful gases, making them safe for indoor use.
- Surfaces remain cool to the touch during operation, protecting children, pets, and surrounding furniture.
- A DIY fireplace installation requires basic tools and can be completed in a single afternoon.
- Proper ventilation space around the insert prevents overheating and ensures safe long-term use.
- Your TV stand may need structural reinforcement depending on the weight of the fireplace unit you choose.
Understanding Electric Fireplace Insert Compatibility with TV Stands
Before you start assembling your tv stand with fireplace, slow down. Not every electric insert fits every stand. It’s important to check three key things: dimensions, weight capacity, and power needs.
Measuring Your TV Stand Opening Dimensions
Use a tape measure to get the height, width, and depth of your stand’s opening. Pick an insert that’s a bit smaller than the space. This helps air flow and prevents overheating. For example, the Belleze 23″ Electric Fireplace Insert needs at least half an inch of space on each side.
- Measure the interior width from left edge to right edge
- Record the height from the base shelf to the top panel
- Check the depth to ensure the insert sits flush or slightly recessed
Checking Weight Capacity and Structural Support
Setting up a fireplace in your entertainment center can be tricky. Most inserts weigh between 20 and 50 pounds. If your stand is made of particleboard, it might not handle the weight. Always check the manufacturer’s weight rating before you start.
| Stand Material | Typical Weight Capacity | Recommended Insert Weight |
|---|---|---|
| Solid Wood | 75–150 lbs | Up to 50 lbs |
| MDF/Engineered Wood | 50–100 lbs | Up to 35 lbs |
| Particleboard | 30–60 lbs | Up to 25 lbs |
Identifying Power Source Requirements
Electric fireplace inserts need a dedicated 120-volt outlet. Don’t share an outlet with your TV, gaming console, and sound bar. It can cause tripped breakers. Consider hiring a licensed electrician to install a separate circuit if needed. Features like the Belleze’s overheating protection and automatic shutdown need stable power to work right.
Essential Tools and Materials for Fireplace Insert Installation
Before we start, let’s avoid a common mistake. Don’t begin a project without the right tools. I’ve been there, and it’s not fun.
For a smooth tv console fireplace setup, gather everything first. Most electric inserts use forced fan heating for rooms up to 400 square feet. Others use infrared technology for spaces up to 1,000 square feet. Knowing your unit’s type helps you choose the right ventilation materials.

- Tape measure (precision is everything)
- Level — because a crooked fireplace screams “DIY disaster”
- Screwdriver set (Phillips and flathead)
- Power drill with assorted bits
- Surge protector rated for heating appliances
- Heat-resistant backing material
- Cable management clips or zip ties
- Wood screws or L-brackets for reinforcement
If your tv stand needs structural changes, call a professional carpenter. Safety is not something to take lightly.
| Tool/Material | Purpose | Estimated Cost |
|---|---|---|
| Tape Measure | Measuring opening dimensions | $5–$15 |
| Power Drill | Securing brackets and screws | $30–$80 |
| Surge Protector | Electrical safety for the insert | $15–$40 |
| Heat-Resistant Board | Protecting the TV stand interior | $10–$25 |
| L-Brackets | Reinforcing stand structure | $5–$12 |
| Cable Management Kit | Organizing power cords neatly | $8–$20 |
With these tools ready, the fireplace insert installation steps will seem less daunting. Now, let’s get that TV stand ready for its new centerpiece.
Preparing Your TV Stand for Electric Insert Installation
Before I start, I need to get my TV stand ready. Most TV stands aren’t made for fireplaces. So, I have to make some changes.
Any good guide will tell you: prep work is key. Here are the three main steps I follow.
Removing Existing Shelves and Doors
I begin by clearing out the area for the insert. This means taking out shelves and unscrewing doors. If shelves are fixed, I use a pry bar carefully.
For precise cuts or tricky builds, I suggest getting a pro. A bad removal can harm the whole unit.
Creating Adequate Ventilation Space
Electric inserts make heat, and heat needs to go somewhere. I make sure there’s 3–5 inches of space above and behind it. Cable channels and holes in the rear panel help with airflow and cord management.
Here’s a quick guide I always have:
| Clearance Area | Minimum Space | Purpose |
|---|---|---|
| Top | 3 inches | Heat dissipation |
| Rear | 5 inches | Airflow and cord access |
| Sides | 1 inch | Prevent contact warping |
Reinforcing the TV Stand Structure
My wiring instructions won’t help if the stand falls apart. I add a 3/4-inch plywood sheet or a metal bracket to the base shelf. Wall-anchoring is also essential, for safety.
A simple anti-tip strap kit can be bought at Home Depot for under $10. It prevents falls.
- Use L-brackets at interior corners for added rigidity
- Secure the stand to a wall stud with lag bolts
- Replace particleboard panels with solid wood if sagging is visible
Once the stand is solid and well-ventilated, I’m ready to install the insert.
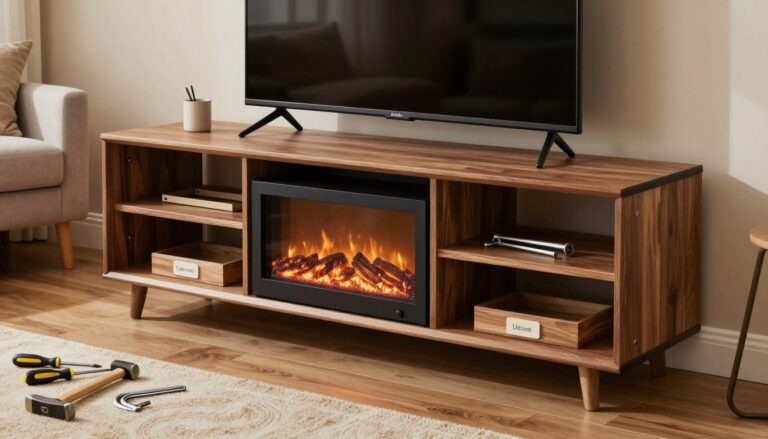
How to Install Fireplace Insert in TV Stand
Now that your TV stand is ready, it’s time to install the fireplace insert. It’s easier than putting together flat-pack furniture. I’ll guide you through each step to make your living room look amazing tonight.

Positioning the Insert Correctly
First, slide the electric fireplace insert into the cabinet opening. It should be a bit smaller than the space, with 0.5 to 1 inch of clearance on each side. This space helps air circulate and prevents overheating.
Push the insert back until it’s flush with the stand’s front edge. Make sure it’s level. A wobbly fireplace is not cozy.
Securing the Fireplace Unit
Most instructions say to fasten the insert with mounting brackets or screws. I use the hardware provided to secure it to the stand’s frame. If there’s a trim kit, snap it into place around the edges. This hides any gaps and gives a custom look.
Managing Cable Organization
Keep the fireplace look by avoiding tangled cords. I use the stand’s cable management holes for the power cable. If there are no holes, a cord clip works well. Make sure the plug is easy to reach.
| Installation Step | Time Estimate | Tools Needed |
|---|---|---|
| Positioning the insert | 5–10 minutes | Level, measuring tape |
| Securing with brackets | 10–15 minutes | Screwdriver, included hardware |
| Attaching trim kit | 5 minutes | Snap-fit (no tools) |
| Organizing cables | 5 minutes | Cord clips, zip ties |
“Measure twice, install once — your future self will thank you.”
With the insert in place and cables organized, plug it into a grounded outlet. Test the heater and flame effects before celebrating. Next, I’ll share important electrical safety tips.
Electrical Safety and Wiring Considerations
Installing media console fireplace inserts is fun. But dealing with electrical needs? That’s not as exciting, but it’s very important. It keeps your house from catching fire.
Most electric fireplaces use standard 120-volt outlets. Sounds easy, right? But, plugging a 1,500-watt heater into a circuit with your TV and sound system can cause problems. It might trip your breakers.
Having a licensed electrician install a dedicated circuit for your insert is a smart move. It’s a small cost that saves you from big troubles.
Before buying, always check for safety certifications. Look for the UL (Underwriters Laboratories) or CSA (Canadian Standards Association) marks. These mean the product has passed tough tests and meets North American standards.
Electric fireplaces have many safety features now. Here are the main ones you should look for:
- Automatic overheat protection that turns off the unit when it gets too hot
- Cool-touch glass and exterior surfaces that keep kids and pets safe from burns
- Timer functions that let you set when the unit turns off
- Tip-over sensors in freestanding models
Never use an extension cord with your electric fireplace insert. Plug it directly into a wall outlet rated for the unit’s amperage.
When installing media console fireplace inserts, keep power cords away from heat vents. Melted insulation on a wire is not fun. These safety features are there to protect you, but only if you set things up right. With the wiring done, you’re ready to test your new setup.
Testing Your Newly Installed Fireplace Insert
You’ve done the hard work. The insert fits perfectly in your TV stand. Now, it’s time for the fun part — testing your electric fireplace. This step is critical before you can relax.
Verifying Heating Functions
Begin by setting the heater to its lowest setting. Wait about 10 minutes, then increase the temperature gradually. Forced fan models can warm up to 400 square feet quickly. Infrared units can heat up to 1,000 square feet while keeping humidity balanced.
During your test, check a few things:
- The fan blows warm air steadily without rattling
- The thermostat reads and adjusts temperatures accurately
- The automatic shut-off feature kicks in when the unit gets too hot
| Heater Type | Coverage Area | Warm-Up Speed | Humidity Impact |
|---|---|---|---|
| Forced Fan | Up to 400 sq ft | Fast (5–10 min) | May dry air slightly |
| Infrared | Up to 1,000 sq ft | Moderate (10–15 min) | Maintains natural humidity |
Checking Flame Effects and Remote Controls
This is where the magic happens. Try every flame brightness level and color option. Use the remote to test each button, including timer settings and temperature adjustments. I once missed this step and found my remote’s timer was dead. Not fun at midnight.
Ensuring Proper Ventilation Flow
After 30 minutes, place your hand near the vents. Air should flow freely without blockage. Poor circulation can cause overheating and shorten your insert’s lifespan.
Make sure nothing blocks the intake or exhaust openings. Proper testing at this stage saves you from future headaches.
Troubleshooting Common Installation Issues
Even the best plans can go wrong. I’ve seen electric insert problems right after setup. But, most issues are simple to fix once you know what to look for.
Addressing Overheating Protection Triggers
If your insert keeps shutting off, it’s okay. That’s the safety system working. Fireplace installation troubleshooting usually finds one main cause: poor ventilation.
“A fireplace insert needs room to breathe — treat clearance requirements like gospel, not guidelines.”
When the overheating sensor trips, I check a few things first:
- Blocked intake or exhaust vents along the top or sides of the unit
- Less than 3 inches of clearance between the insert and the TV stand walls
- Debris or dust buildup around heating elements
- Non-fire-resistant materials like particleboard warping from heat exposure
Make sure your TV stand uses tempered glass or steel near the insert. These materials handle high temperatures well.
Fixing Unstable or Uneven Placement
Wobbly inserts are a safety hazard. Stability issues usually come from uneven weight or a weak TV stand.
| Symptom | Likely Cause | Quick Fix |
|---|---|---|
| Insert rocks side to side | Uneven shelf surface | Add rubber shims beneath the unit |
| TV stand leans forward | Excess front weight | Secure stand to wall with furniture anchors |
| Insert slides when bumped | Smooth interior surface | Apply non-slip grip pads under the base |
I always suggest a wall anchor kit for stands with TVs and inserts. That extra weight needs a solid backup. Once everything is stable, check the automatic shutdown system. Then, enjoy your cozy setup or look into pre-built alternatives.
Alternative Options: Pre-Built Fireplace TV Stands
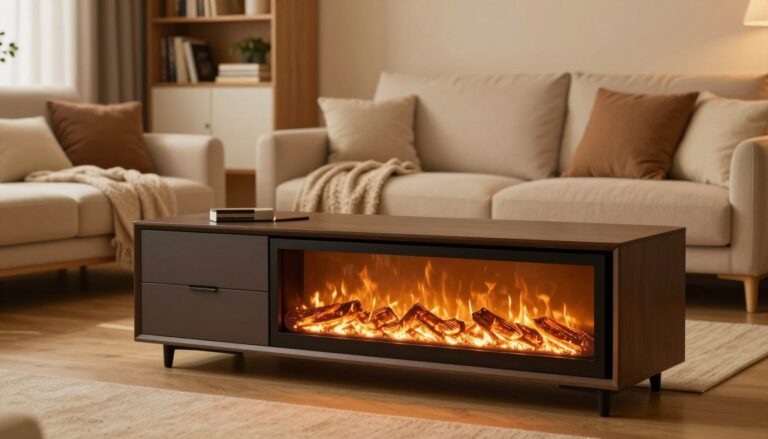
I’ll be honest — not everyone wants to grab a drill and start modifying furniture on a Saturday afternoon. If the DIY route sounds like a headache, pre-built fireplace TV stands are your shortcut to cozy living without the sweat.
All-in-one fireplace entertainment centers come fully assembled (or close to it) with the electric insert already fitted. No measuring, no reinforcing, no “will this fit?” anxiety. I appreciate that kind of simplicity. These units typically heat 400 to 1,000 square feet without producing wood smoke, ash, or regret.
Here are a few standout models worth your attention:
| Model | Style | Key Feature | Heating Coverage |
|---|---|---|---|
| Belleze Bardot Modern Fireplace TV Stand | Modern | Panoramic LED display with realistic flame effects | Up to 400 sq ft |
| Avenue Long TV Stand | Contemporary | Sleek silhouette with golden alloy handles | Up to 400 sq ft |
| Lenore Modern Fireplace TV Stand | Transitional | Crown molding blending classic and modern design | Up to 1,000 sq ft |
| Sofia Mid Century Modern TV Stand | Mid-Century | Adjustable flame brightness with firewood crackling sounds | Up to 400 sq ft |
What I love about pre-built fireplace TV stands is the zero guesswork. The manufacturer has already matched the insert to the stand’s dimensions, weight capacity, and ventilation needs. You just unbox, plug in, and enjoy.
If you tried the installation steps above and hit too many snags, all-in-one fireplace entertainment centers offer a clean reset. They’re a smart investment for anyone who values warmth and style — minus the DIY drama.
Conclusion
So, can you put an electric fireplace in your TV stand? Absolutely! But should you? That’s the real question. If your stand has a fireplace area, it’s a simple weekend job. But if it doesn’t, you’ll need to get out the saw and show off your carpentry skills.
Retrofitting a TV stand is not easy. You’ll have to remove doors, cut holes, and make shelves stronger. And you must be careful with electrical safety. Make sure your stand is wider than your TV for support and a balanced look.
If DIY projects scare you, consider a pre-made fireplace TV stand. Brands like Walker Edison or Ameriwood Home offer these. They make it easy to get to the cozy, warm feeling of a fireplace. Either way, you’ll make your living room a cozy retreat.
How do I measure my TV stand for a fireplace insert installation?
Do I need a dedicated electrical outlet for my electric fireplace insert?
Can I install a fireplace insert in a TV stand that wasn’t designed for one?
Is it safe to mount a TV above an electric fireplace insert in an entertainment center?
What are the fireplace insert installation steps for a TV console fireplace setup?
How much space can an electric fireplace insert heat effectively?
What should I look for in electric fireplace insert safety certifications?
Why does my electric fireplace keep shutting off after installation?
Are pre-built fireplace TV stands worth it compared to a DIY electric insert wiring and installation?
How do I manage cords and cables when mounting a fireplace in an entertainment center?
giveitlegs@live.com
Contributing writer covering Honest reviews & buying help for fireplace TV stands and electric media consoles..