How to Build a TV Stand with Fireplace Insert
Affiliate links — we may earn a commission
Last winter, I stood in my living room, looking at a blank wall. It felt cold. My old entertainment center was scratched, wobbly, and outdated. I wanted warmth and something to be proud of when friends visited.
So, I decided to build a TV stand with a fireplace insert. It completely changed my home’s vibe.
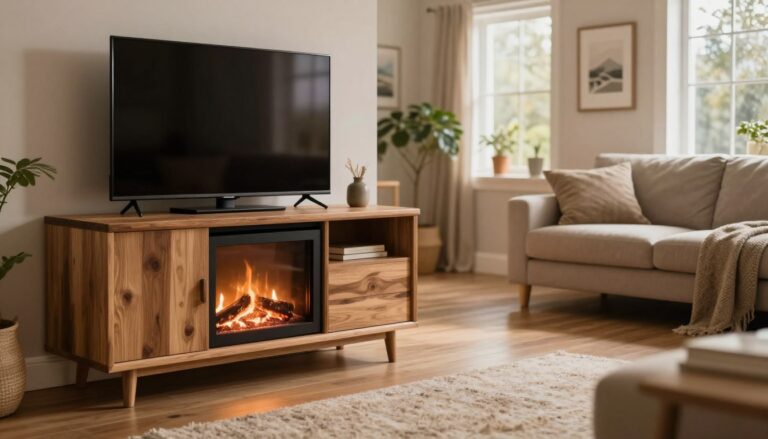
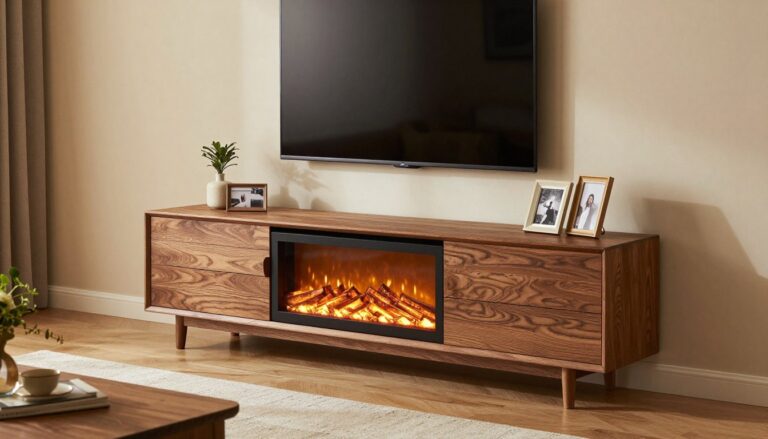
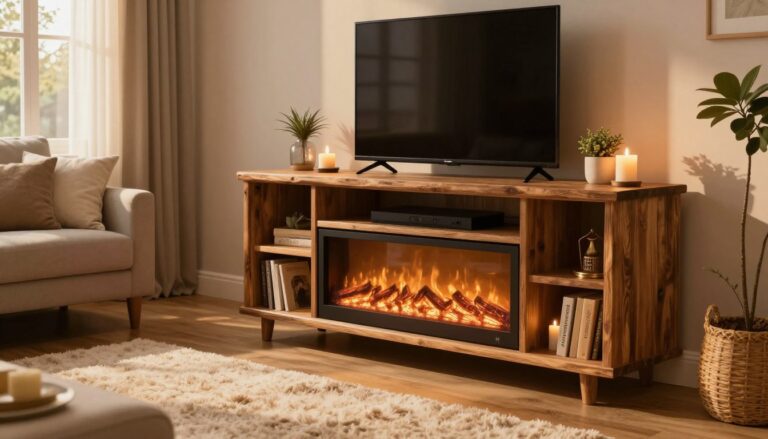
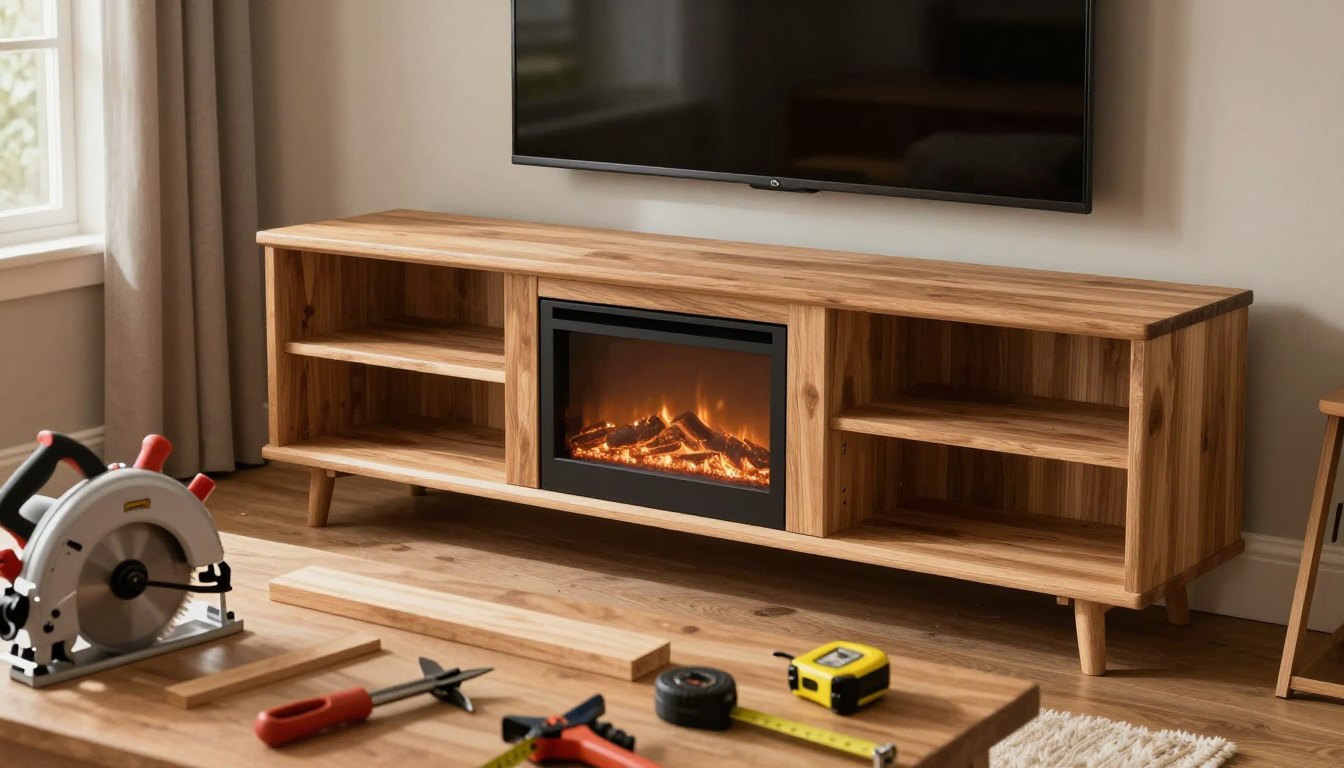
This DIY project was a rare success. It turned out better than the Pinterest photo I followed. The build created a stunning 72-inch entertainment center with a shiplap front. It looks like a full bump-out, without the hassle or cost of tearing into your wall.
Whether you want it freestanding or mounted, this plan is for beginners to intermediate builders. It fits a 30″ x 18-24″ electric insert. If you have a different size, no worries. Inserts from 28 to 36 inches need only minor changes. Even 40-inch-plus models just need simple adjustments.
I’ll share every step, mistake, and trick I learned. Trust me, if my clumsy hands can do it, yours can too.
Key Takeaways
- This DIY project builds a stunning 72-inch entertainment center with a built-in electric fireplace insert.
- The shiplap front face creates a high-end bump-out look without major construction work.
- Standard dimensions fit a 30″ x 18-24″ insert, but plans adapt easily for sizes from 28 to 40+ inches.
- The build suits beginning to intermediate skill levels — no expert carpentry required.
- You can install the finished piece as a freestanding unit or secure it permanently to your wall.
- Learning how to build a tv stand with fireplace insert saves hundreds compared to retail options from brands like Wayfair or Pottery Barn.
Why I Decided to Build My Own Fireplace TV Stand
I spent weeks looking for the perfect fireplace TV stand online. But every option was either too pricey, flimsy, or didn’t fit my space. So, I decided to build one myself, making sure it met all my needs.
The Appeal of a DIY Media Console Electric Fireplace
Building a DIY media console electric fireplace means you have total creative control. I used shiplap paneling to make it look like a real fireplace, without any big construction work. Plus, it’s freestanding, so I can easily move it if I change my living room layout.
Cost Savings Compared to Store-Bought Options
Buying a fireplace TV stand from stores can cost a lot, from $300 to over $800. But I built mine for much less. I used common lumber and MDF, keeping costs down without losing quality.
| Option | Average Cost | Customizable | Build Quality |
|---|---|---|---|
| Store-Bought (Budget) | $250–$400 | No | Particle board |
| Store-Bought (Mid-Range) | $400–$800 | Limited | MDF/Engineered wood |
| DIY Custom Build | $150–$300 | Fully | Solid lumber and MDF |
Customization Benefits for My Living Space
My living room has a weird nook that no furniture fits. A custom build let me design it to fit my wall and my electric insert perfectly. I picked the trim, paint, and mantle depth myself. This made my project not only cost-effective but also look like it’s from a design magazine.
With my plan ready and motivation high, the next step was to design every detail, from insert size to materials.
Planning Your Custom TV Stand with Fireplace Design
Before I started building, I spent a lot of time planning. Rushing into a project without a plan is like trying to build IKEA furniture without instructions. It’s not a good idea. Here are the main decisions I made first.
Determining the Right Insert Dimensions
Choosing the right size for your TV stand fireplace insert is everything. I followed a standard plan for a 30″ x 24″ electric insert. Most designs work with inserts between 28″ and 36″ without trouble. If you want a bigger insert, like the Touchstone Sideline 50, you’ll need to make the frame wider. This is an easy change, not a complete redo.
| Insert Size | Frame Width Needed | Plan Adjustments |
|---|---|---|
| 28″–30″ | 34″–36″ | None — fits standard plan |
| 36″ | 40″–42″ | Minor width increase |
| 40″–50″ | 46″–56″ | Extended framing and supports |
Choosing Between Freestanding and Built-In Styles
I had two options: a freestanding unit or a built-in piece. A custom TV stand with fireplace can even act as a double-sided room divider. Jon Peters made a stunning double-sided cabinet with the Touchstone Sideline 50. It made me think about making something more than just a console.
Selecting Materials for Your Build
My planning led me to three main materials:
- 2×4 lumber for the internal frame structure
- Shiplap pieces for the face and side panels
- Trim boards for a polished, finished look
These materials are affordable, easy to find at stores like Home Depot, and simple to work with. With your dimensions and style decided, you’re ready to get your supplies. That’s what I’ll talk about next.
Essential Tools and Materials I Used
Before starting my DIY fireplace TV stand, I had to get ready. Forgetting something important can really slow you down. I learned that the hard way.
| Material | Quantity | Size |
|---|---|---|
| 2×4 Lumber | 4 pieces | 8 feet each |
| Shiplap Boards | 4 pieces | 5-1/2″ wide x 8 feet |
| 1×12 Board | 1 piece | 12 feet |
| 1×2 Trim | 2 pieces | 8 feet each |
| 2×2 Lumber | 2 pieces | 8 feet each |
For hardware, I got 1-1/4″ and 2″ brad nails, 30 self-tapping star bit screws, and wood glue. Don’t skimp on the wood glue. It’s key for a strong build.
Here are the tools I needed to make this project happen:
- Miter saw for precise cuts
- Brad nailer (pneumatic or cordless)
- Drill/driver with a star bit
- Tape measure and speed square
- Level — because eyeballing it is never the answer
- Clamps for securing glued joints
I cut four 2×4 pieces at 48″ for the frame’s bottom. I also cut four 2×4 pieces at 33″ for the sides. Two 1×12 pieces at 36″ became the sides, and one 1×12 at 49-1/2″ was the top. I marked every measurement on blue painter’s tape. It helped me avoid mistakes during assembly.
How to Build a TV Stand with Fireplace Insert
Let’s dive into the heart of this project. We’ll turn raw lumber into a beautiful piece of furniture. Building a TV stand with a fireplace insert involves three main stages. I’ve broken each stage into simple steps to make it easy.
Creating the Frame Structure
The frame is the backbone of your project. I chose 2×4 lumber for its affordability, strength, and availability at Lowe’s or Home Depot. Here’s what I needed:
| Component | Quantity | Length | Purpose |
|---|---|---|---|
| Vertical Studs | 6 | 32 inches | Side and center support |
| Top/Bottom Rails | 4 | 60 inches | Horizontal span |
| Cross Braces | 4 | 14 inches | Depth and rigidity |
I built each part flat on the garage floor. Then, I stood them up and connected them. This method made it easier for me to build alone.
Installing the Shiplap Face
This step adds the magic touch. The shiplap gives your stand a classic, textured look. Think Joanna Gaines style without the HGTV budget. I cut each plank to fit the front face and nailed them horizontally.
- Start from the bottom and work up
- Use a level on every single board
- Leave a nickel’s width of gap between planks for that authentic look
Good shiplap installation turns a simple box into something that looks like it came from Pottery Barn.
Adding Support for the Electric Insert
Your fireplace insert needs a strong base. I used 3/4-inch plywood to create a reinforced shelf inside the frame. Make sure the plywood matches your insert’s size. Most electric inserts weigh between 25 and 50 pounds. Skipping on support is a terrible idea.
Measure twice, cut once — and measure the insert three times, because returns are no fun.
Building the Fireplace TV Stand Wood Frame
This is where the magic happens. Your living room will stop looking like a construction zone. It will start looking like progress. Building the wood frames is all about precision cuts and solid connections. Get this right, and everything else falls into place like a dream.
Cutting and Assembling the 2×4 Framework
I started by cutting my lumber to size. The structural framework needs two sets of pieces:
- 4 horizontal 2x4s cut to 48 inches
- 4 vertical 2x4s cut to 33 inches
Measure twice, cut once — it’s a cliché, but it’s true. A miter saw makes quick work of these cuts. I laid everything out on a flat garage floor before driving a single screw.
Securing Horizontal and Vertical Supports
For assembly, I used 2-1/2 inch self-tapping screws with a star bit. Star bits grip better than Phillips heads and won’t strip out. I applied wood glue at every joint before screwing things together.
A strong frame is not about using more screws — it’s about placing them where they matter most.
| Component | Quantity | Length | Purpose |
|---|---|---|---|
| Horizontal 2x4s | 4 | 48 inches | TV weight support and base stability |
| Vertical 2x4s | 4 | 33 inches | Upright structural integrity |
| Self-tapping screws | 24+ | 2-1/2 inches | Joint fastening |
Ensuring Proper Weight Distribution
The horizontal supports carry the TV’s weight, so spacing them evenly is critical. I placed my verticals at equal intervals to keep the framework balanced. Uneven spacing means stress points — and stress points mean a bad day for your 65-inch screen.
With the frame squared up and solid, I was ready to move on to installing the electric fireplace insert. That’s where this project really starts to heat up.
Installing Your Electric Fireplace Insert TV Console
This was the moment I’d been waiting for. I slid the Touchstone Sideline 50 into the cabinet opening I built. The installation was smoother than I thought. The insert fit perfectly into the framed opening. Because it was.

Before starting, check that your cabinet opening matches the insert’s dimensions exactly. The Touchstone Sideline 50 needs a 50.4″ x 5.5″ x 21.6″ opening. I measured twice, triple-checked, and held my breath. A snug fit makes the flame display look seamless through the front panel.
Here’s what I love about the mounting techniques I used:
- The insert rests on the bottom support frame — no complicated wall brackets needed
- Small L-brackets on each side keep it locked in place
- The power cord routes through a pre-drilled hole in the back panel
- The entire cabinet stays portable, so I can move it if I rearrange my room
One design choice that paid off was the double-sided approach. From the front, you see a gorgeous flame display dancing behind glass. From the back, you get access to storage and cable management. The mounting techniques keep everything secure without permanent attachment.
The best DIY projects are the ones that look like you paid someone way too much money to build them.
The full installation process took me about 30 minutes. I plugged it in, hit the remote, and watched those LED flames flicker to life. No gas line. No chimney. No regrets. With the insert locked in, I was ready to move on to the finishing touches that would make this build look truly custom.
Adding the Finishing Touches to Your DIY Fireplace TV Stand Plans
The frame is built. The insert fits snugly. Now comes my favorite part — the finishing details. These details turn raw lumber into a piece that looks like it cost a fortune. Trust me, this is where your project goes from “I built a box” to “I built that?!“
Attaching Decorative Trim and Molding
Trim installation is what makes a weekend hack into a showpiece. I used 1×2 and 2×2 boards cut to specific lengths. Every piece gets secured with brad nails and wood glue for a rock-solid hold. Here are the exact cuts I made:
| Trim Piece | Material | Length | Quantity | Placement |
|---|---|---|---|---|
| Side Trim | 1×2 | 11-1/4″ | 4 | Left and right of insert |
| Front Vertical Trim | 2×2 | 51″ | 2 | Front frame edges |
| Front Horizontal Trim | 1×2 | 33-3/4″ | 2 | Top and bottom front |
Creating the Optional Wood Mantle Top
A wood mantle top is entirely optional, but I couldn’t resist. It gives the whole build a traditional look. Like something you’d find in a Craftsman-style home. I used a stained hardwood plank that overhangs the frame by about two inches on each side. The contrast between painted trim and natural wood is stunning.
Installing Side Panels and Back Support
For the side panels, I grabbed 1×12 boards cut to 36 inches each. They wrap the frame and hide the exposed studs. The back support panel is essential if you’re planning a room divider configuration from DIY fireplace TV stand plans. It keeps everything rigid and stable, even in a freestanding setup.
- Attach side panels flush with the front trim installation using brad nails
- Apply wood glue along every seam for extra strength
- Secure the back panel to horizontal supports for stability
A good finish isn’t about perfection — it’s about making imperfections invisible.
With these finishing details complete, your build is ready for paint and final touches. The next step covers surface prep and choosing the right paint to make everything look polished and professional.
My Fireplace TV Stand Construction Guide Tips
I learned a few things the hard way so you don’t have to. This guide wouldn’t be complete without the prep work. Trust me — the details matter.
https://www.youtube.com/watch?v=WlqDmDN_V-Y
Start by filling every nail and screw hole with quality wood filler. I used DAP Plastic Wood-X because it dries fast and sands like butter. Let it cure completely before touching it. Rushing this step is the enemy of a smooth finish.
Once the filler is dry, sand the excess flush with the surface. Grab 120-grit sandpaper and go over the entire project, always following the direction of the wood grain. This is one of my most important building tips: sanding against the grain leaves scratches that show up under paint like a neon sign.
Here’s my assembly advice for the cleanup stage:
- Use a soft bristle brush or shop vacuum to remove all sanding dust from seams and corners
- Wipe every surface with a damp, lint-free cloth
- Wait for the wood to dry fully before applying primer
- Prime with a stain-blocking primer like Zinsser Bulls Eye 1-2-3
- Finish with a high-quality interior trim and cabinetry paint for a durable, professional look
The difference between a DIY project that looks homemade and one that looks custom-built is about thirty minutes of patient prep work.
These building tips saved me from repainting my entire build twice. Skipping prep is like skipping leg day — it catches up with you. Put in the effort now, and the finishing stage (coming up next) will reward you with a result that genuinely impresses.
Customization Options I Discovered
When I started installing the fireplace insert TV stand, I saw it as a blank canvas. The customization options were amazing. This project’s versatile design lets you make changes I never thought possible.
Adapting Plans for Different Insert Sizes
Not all electric inserts are the same size, and that’s totally fine. The plans for this build can adjust easily for inserts from 28 to 36 inches. You just need to adjust a few measurements.
For 40-inch or larger inserts, you’ll need to make some simple changes. These changes are easy to do without needing an engineering degree.
| Insert Size | Frame Adjustment Needed | Difficulty Level |
|---|---|---|
| 28 inches | Minimal — standard plan works | Easy |
| 36 inches | Minor width increase | Easy |
| 40+ inches | Widen frame and adjust supports | Moderate |
Creating a Double-Sided Room Divider Design
This design really stands out. Inspired by Jon Peters, you can make a double-sided cabinet. It works as a room divider.
One side shows the fireplace glow, and the other has shelving. Place it between your living room and dining area for a wow factor.
Adding Storage Shelves and Cable Management
Now, let’s talk about the practical customization options. They keep your setup looking neat:
- Route cables through pre-drilled holes in the back panel
- Add adjustable shelves on either side for media equipment
- Install a hidden power strip inside the cabinet for cord-free aesthetics
- Use cable clips along interior frame supports to keep wires tidy
Cable management solutions fit right into the build. No one wants a beautiful console ruined by messy cords behind it.
Finishing and Painting Your DIY Project
This is where the magic happens. Raw wood turns into something amazing. I almost skipped this step. Big mistake. The right painting and surface prep make a huge difference.

Preparing the Surface for Paint
Surface prep is key, but not glamorous. I filled nail holes and seams with Bondo wood filler. After it dried, I sanded with 120-grit sandpaper, always with the grain.
Then, I swept and wiped the surface clean. Dust is the enemy of a great finish. I let it dry before priming.
Choosing the Right Interior Trim Paint
Not all paints are the same. For this project, I chose paint for trim and cabinetry. Here’s what I looked at:
| Paint Type | Durability | Dry Time | Best For |
|---|---|---|---|
| Latex Satin | Moderate | 1–2 hours | Low-traffic surfaces |
| Alkyd Hybrid (Benjamin Moore Advance) | High | 16 hours | Cabinetry and built-ins |
| Acrylic Enamel (Sherwin-Williams ProClassic) | High | 4–6 hours | Trim and furniture |
I picked Benjamin Moore Advance in semi-gloss. It looks great and resists scuffs well.
Applying Professional-Looking Finishes
I used thin coats for a smooth finish. A foam roller for flat areas and a brush for corners.
- Apply one coat of bonding primer and let it cure fully
- Lightly sand primer with 220-grit for extra smoothness
- Roll on two to three thin coats, waiting between each
- Inspect under side lighting to catch drips or missed spots
Being patient with each coat paid off. I got a finish that looks like it was store-bought. Worth every extra hour.
Conclusion
My DIY TV stand with fireplace insert turned out amazing. I was surprised, even though I’ve had my share of building fails. This stand can hold inserts from 30 to 40 inches. The shiplap design makes it look like a pro did it, and it didn’t cost me a fortune.
This project is a win for anyone who knows a bit about woodworking. You don’t need a fancy workshop or years of experience. Just a few basic tools, some materials, and a weekend are enough. You can find free plans online to help you every step of the way.
The result is a cozy entertainment center with an electric fireplace. It’s perfect for cold movie nights. You can make it fit your space just right. So, get your tools ready, choose your insert size, and start your project. It will add warmth and style to your living room without breaking the bank.
How difficult is it to build a TV stand with fireplace insert if I’m a beginner?
What TV stand fireplace insert dimensions does the standard plan accommodate?
What materials do I need for this DIY media console electric fireplace project?
Can I install the fireplace insert TV stand as a freestanding unit or does it need to be built in?
How does the shiplap front face create a bump-out appearance?
Can I build this as a double-sided room divider with the electric fireplace insert?
What’s the cut list for building the fireplace TV stand wood frame?
How do I finish and paint the completed TV stand for a professional look?
How do I ensure proper weight distribution when installing the electric fireplace insert TV console?
How much can I customize the DIY fireplace TV stand plans for different fireplace insert sizes?
giveitlegs@live.com
Contributing writer covering Honest reviews & buying help for fireplace TV stands and electric media consoles..