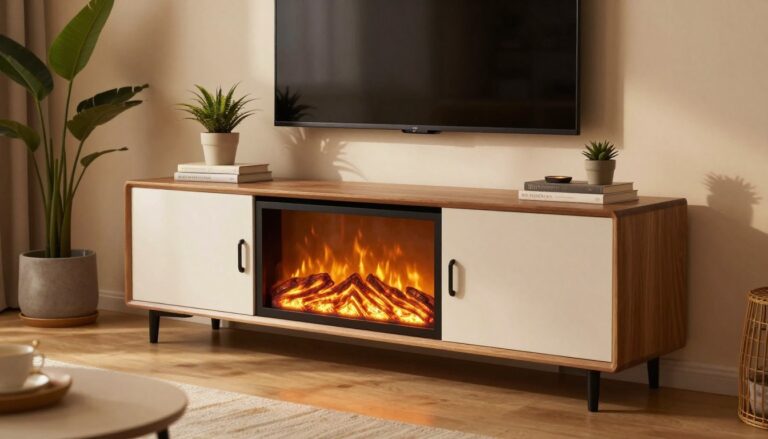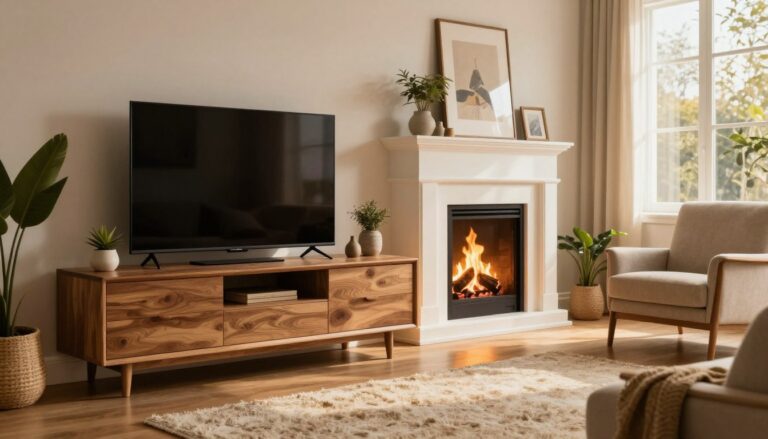

How to Build an Electric Fireplace TV Stand That Wows
Affiliate links — we may earn a commission
I stood in my living room last winter, looking at a huge entertainment center. It was too big for my 1,200-square-foot home. The shelves were dusty, showing off all my ugly cables and cords. That’s when I decided to make my own electric fireplace TV stand.
Today’s electric fireplaces are much better than the old ones. Brands like Dimplex and Touchstone make them look real. They also heat up the room quickly, even on very cold days. I even use natural wood incense to make it smell like a campfire.
Here’s a cool trick I found. Sometimes, buying a fireplace TV stand unit and removing the insert is cheaper than just the insert. I used the insert for my custom surround and turned the leftover furniture into a garage workbench.
Building your own lets you choose the size and design. You can pick hidden storage instead of open shelves. This guide will help you build a custom surround that looks professional.
Key Takeaways
- A DIY electric fireplace TV stand lets you customize dimensions to fit small or awkward spaces that store-bought units can’t handle.
- Modern electric fireplace inserts produce real heat, making them practical for supplementing your home’s heating system during cold months.
- Buying a complete unit and repurposing just the insert can save you money compared to purchasing a standalone fireplace insert.
- Building a custom fireplace surround gives you full control over hidden storage for cable boxes, gaming consoles, and messy wiring.
- Basic woodworking tools like a miter saw, drill, and Kreg Jig are all you need to get started on this project.
- Natural wood incense paired with your electric fireplace creates a convincing wood-burning experience without the mess or chimney.
Why I Ditched Store-Bought Options for a DIY Electric Fireplace TV Stand
I spent weeks looking at big-box websites. Every ready-made unit made me unhappy. So, I decided to build my own fireplace media console. It was a great choice for my home.
The Problem with Pre-Made Fireplace Entertainment Centers
Most units are for big rooms, not small houses like mine. They took up too much space. And the open shelving showed off all my messy cables and dusty devices.
| Feature | Store-Bought Units | DIY Custom Build |
|---|---|---|
| Size Options | Limited standard sizes | Exact fit for your space |
| Storage Type | Open shelving | Hidden compartments with glass doors |
| Appearance | Generic TV stand look | Built-in fireplace surround look |
| Average Cost | $400–$800 | $150–$350 in materials |
My Journey from Skeptic to Electric Fireplace Believer
I thought electric fireplaces looked fake. But a friend’s changed my mind. Her fireplace was warm and looked real. I found a plan on Ana White’s site and started my project.
Getting the Perfect Size and Hidden Storage Solution
My design has a hidden spot above the fireplace. A glass panel covers the cable box, but lets the remote work. It looks like a real fireplace, not a TV stand.
Tip: you can take apart store-bought fireplaces. I kept the insert and sold the rest for $50. With my plans, I was ready to start my project.
Planning Your Custom TV Stand with Fireplace Insert Design
Before I started, I spent a lot of time planning. Trying to build a custom TV stand with a fireplace insert without a plan is a bad idea. It can cost a lot of money and cause frustration.
Measuring Your Space and Choosing the Right Dimensions
First, grab a tape measure and get exact wall dimensions. I mean, down to the quarter inch. Knowing the size of your fireplace insert is key. Brands like Touchstone publish these specs online, so you can plan your build before buying the insert.
Make sure the stand’s width fits your TV and the wall. A 65-inch TV needs at least 60 inches of width. Add 2–3 inches on each side for airflow.
Selecting Between Frame-and-Panel or Solid Wood Construction
This choice affects your whole project. Here’s a quick comparison:
| Feature | Frame-and-Panel | Solid Wood Panels |
|---|---|---|
| Tools Required | Router table with straight-cutting bit | Basic tools (no router needed) |
| Skill Level | Intermediate to advanced | Beginner-friendly |
| Look | Classic, furniture-grade | Clean and modern |
| Panel Movement | Floating panel absorbs wood movement | Glue-up technique required |
Frame-and-panel uses grooves cut into the frame sides with a floating center panel. It looks stunning. If you don’t own a router table, solid wood glue-ups work great and skip the fuss entirely.
Deciding on Open Shelving vs Hidden Cable Box Storage
I had to decide between open shelving and hidden storage. Open shelving makes it easy to find your remote. Hidden storage keeps things looking neat. My custom TV stand with fireplace insert uses glass panels so I can aim the remote without seeing cables.
- Open shelves — simple to build, easy device access
- Glass-front cabinets — clean look, IR signals pass through
- Solid doors — maximum hiding power, may need an IR repeater
With your design set, you’re ready to get the right tools and materials for the build.
Essential Tools and Materials for Building Fireplace Media Console
Before starting, I made sure to gather all the necessary materials. A trip to the hardware store mid-project is a big waste of time. Here’s what I got for my woodworking electric fireplace cabinet.
Basic Tools You’ll Need (Miter Saw, Drill, and Kreg Jig)
You don’t need a huge workshop to make this project. My essential tools were:
- Miter saw for precise angle cuts on molding and trim
- Cordless drill for driving screws and pre-drilling holes
- Kreg Jig for pocket hole joinery — this tool is a game-changer
- Pin nailer (or a small hammer and finishing nails) for attaching molding
- Tape measure, square, and clamps
Wood Selection: Select Pine vs Common Pine Options
Choosing between select pine and common pine depends on your budget and patience for sanding. Here’s a quick comparison to help you decide.
| Feature | Select Pine | Common Pine |
|---|---|---|
| Appearance | Clear, knot-free grain | Visible knots and color variation |
| Cost per Board Foot | $3.50–$5.00 | $1.50–$3.00 |
| Best For | Painted or stained finishes | Rustic or painted builds |
| Prep Work Needed | Minimal | Moderate (filling knots) |
I used a variety of boards, including 1×3, 1×4, 1×5, 1×6, and 1×12. I also used 1/4-inch plywood for the panels.
Hardware and Finishing Supplies Shopping List
For hardware, I kept it simple. I bought 1-1/4-inch pocket screws, #8 wood screws, 1-inch pin nails, and quality wood glue. For the glass doors, I got retainer clips and had glass cut to 3-1/4 by 23-3/8 inches at Home Depot.
A well-planned shopping list separates a weekend woodworking electric fireplace cabinet project from a month-long headache.
With all my supplies ready, I was set to start building the frame assembly.
How to Build an Electric Fireplace TV Stand
Now it’s time for the fun part — building your electric fireplace TV console. I divided the project into three stages: the front frame, side panels, and platforms. Each stage uses pocket screw assembly to ensure tight and clean joints. Let me guide you through my process.
Creating the Front Frame with Pocket Screws
I began with two 1×5 stiles and drilled pocket holes at each end. One 1×5 board is the top rail, and one 1×4 is the bottom rail. The pocket screw assembly is critical here, making everything square and strong.
I used 2-3/4″ scrap wood spacers between the rails. This ensured the top opening fit my fireplace insert perfectly. No need for guesswork or headaches.
Building Side Panels Using Shaker Door Techniques
For the side panels, I drew inspiration from Shaker cabinet design. Each panel consists of:
- Four 1×3 stiles (two per side)
- Two 1×3 top rails
- Two 1×4 bottom rails
- 1/4″ plywood center panels
Want a simpler approach? You can use two 1×12 boards with pocket holes along the edges. It’s less complex but sturdy for your electric fireplace TV console.
Assembling the Top and Bottom Platforms
Each platform requires four 1×6 and two 1×4 boards, joined edge-to-edge with pocket screws. I set the side panels 3/4″ inward on both platforms while keeping the back flush.
Measure twice, drill once — this is key when pocket screws hold your TV’s future home together.
With these three assemblies done, you’re ready to frame the fireplace insert opening next.
Constructing the Perfect Fireplace Insert Opening
This is when your DIY media center with electric fireplace starts to look like a real piece of furniture. Getting the opening right felt like defusing a bomb. One wrong measurement and the whole thing looks crooked. But once you nail it? Pure satisfaction.
The front appearance assembly is where the magic happens. You’ll need two 1×3 stiles and two 1×4 rails — one for the top, one for the bottom. Join them with pocket holes for a clean, screw-free face. I used 4-3/4″ scrap wood spacers along the top to keep my spacing dead even. Trust me, eyeballing it is a recipe for regret.
“Measure twice, cut once” is cute advice. I measure four times because I’m not made of money.
Once your front appearance assembly is ready, glue it and attach it to your front subassembly. Keep those tops flush. Use countersink holes and 1-1/4″ wood screws so nothing pokes out or catches the eye.
Now, here’s the part people skip — and shouldn’t. Your fireplace insert framing must include 2×4 supports behind the opening. Electric inserts carry real weight, and a flimsy frame will sag over time. Build it sturdy.
- Frame the opening with 2x4s on all four sides for solid support
- Position an electrical outlet on the side of the opening — perfect for plugging in holiday lights on the mantel
- Keep minimal depth behind the unit, as heat vents from the front of the insert
That side-mounted outlet is a small detail that pays off big during the holidays. With your opening framed and wired, you’re ready to move on to the full cabinet frame assembly.
Woodworking Electric Fireplace Cabinet Frame Assembly
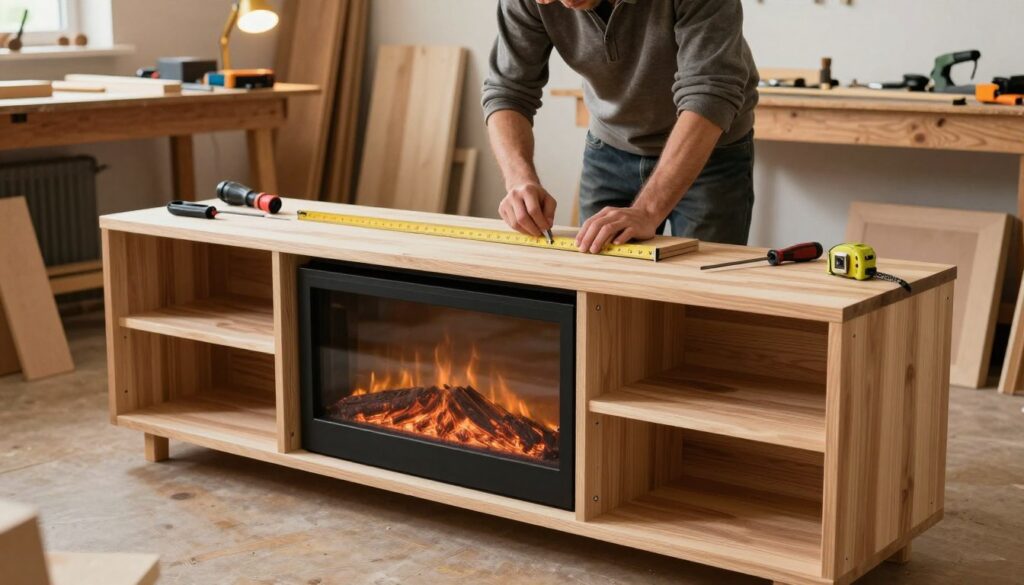
This is where your project starts looking like actual furniture instead of a pile of lumber. The cabinet frame construction phase brings everything together. It’s more satisfying than peeling plastic off a new phone screen. With the fireplace opening already built, it’s time to add the structural and decorative base elements.
Attaching Plinth Blocks for Professional Appeal
Plinth blocks are those chunky little squares at the base of fine furniture that scream “I know what I’m doing.” To make them, I glued two 1×4 pieces together for each block — two blocks total. Once dry, I positioned them on the front, flush to the inside of the assembly. I secured each block with 2″ wood screws through countersink holes so nothing shows on the surface.
A great fireplace TV stand building tutorial always reminds you: plinth blocks turn a basic box into a statement piece.
Installing Support Stretchers and Decorative Feet
The feet give your stand its personality. I cut eight 1×2 pieces — four for the front and back, four for the sides. On each piece, I marked 3/4″ down and cut a 60-degree angle for a tapered look. Side feet need pocket holes drilled at both ends. Make sure you create right and left versions so they mirror each other.
For the stretchers, I used four 1×3 pieces — two for the front/back and two for the sides. Positioning matters during cabinet frame construction: front and side pieces sit in 3/4″ from the edge, while back pieces stay flush.
| Component | Material | Quantity | Screw Size |
|---|---|---|---|
| Plinth Blocks | 1×4 (doubled) | 2 | 2″ wood screws |
| Front/Back Feet | 1×2 | 4 | 2″ wood screws |
| Side Feet | 1×2 | 4 | 2″ wood screws |
| Front/Back Stretchers | 1×3 | 2 | 1-1/4″ screws |
| Side Stretchers | 1×3 | 2 | 1-1/4″ screws |
With stretchers and feet locked in, this fireplace TV stand building tutorial moves next into the molding and trim details. These details make your piece look store-quality — without the store-quality price tag.
Adding Professional Molding and Trim Details
This is where your DIY build goes from “nice try” to “wait, you made that?” Molding turns a plain box into a catalog-worthy piece. I spent more time on professional fireplace trim installation than I expected. But the payoff was absolutely worth it.
Installing Bed Molding Under the Top Edge
Bed molding adds a classic, finished look beneath the top edge. The trick? Cut it upside down in your miter saw, just like crown molding. I made my end pieces first with 45-degree angles, glued them in place, and secured each with 1-inch pin nails.
The center piece gets matching 45-degree angles on both ends. Always dry-fit before committing — trust me on this one.
Applying Cove Molding Above Plinth Blocks
Cove molding sits right on top of the plinth blocks you installed in the previous step. Use the same molding techniques: cut the end pieces first, test the fit, glue, and pin nail. This small detail ties the base of the cabinet to the vertical elements.
It gives the whole piece a cohesive, furniture-grade appearance. Pre-made wood corner pieces from stores like Lowe’s or Home Depot can clean up any tricky corner joints.
Pro Tips for Cutting Small Molding Pieces Safely
Small molding pieces can kick back or fly off the saw in a heartbeat. Here’s what keeps my fingers intact:
- Clamp scraps to a sacrificial board before cutting
- Never hold pieces shorter than 6 inches by hand near the blade
- Use a sharp, fine-tooth blade (80 teeth minimum) for clean cuts
- Wear safety glasses — tiny molding shards are vicious
| Molding Type | Placement | Cut Angle | Attachment Method |
|---|---|---|---|
| Bed Molding | Under top edge | 45 degrees (upside down) | Wood glue + 1″ pin nails |
| Cove Molding | Above plinth blocks | 45 degrees (upside down) | Wood glue + 1″ pin nails |
| Wood Corner Pieces | Inside corners | No cutting needed | Wood glue + pin nails |
With professional fireplace trim installation complete, your cabinet frame will look sharp and intentional. Next up, I’ll walk you through the creative finishing options that bring out the beauty of all this careful woodwork.
Creative Finishing Options for Your DIY Media Center with Electric Fireplace
Now, the real fun starts. Your build will go from a woodworking project to a stunning piece. Choosing paint and stain is key to your project’s personality.
Begin by sanding every surface to a smooth finish. Use 120-grit, 150-grit, and 220-grit sandpaper in sequence. Skipping a grit can ruin your finish. Once it feels silky, you have two options:
- Stain with a clear polyurethane topcoat for a natural wood look
- Primer coat followed by two coats of paint for a bold, modern feel
For custom paint, think outside the box. Sherwin-Williams Jasper is a deep green that adds a rich vibe. Sherwin-Williams Westchester Gray is perfect as a neutral base coat.
| Finish Type | Best For | Coats Needed | Dry Time Between Coats |
|---|---|---|---|
| Oil-based stain + poly | Rustic or traditional styles | 1 stain + 2–3 poly | 4–6 hours |
| Latex primer + paint | Modern or painted looks | 1 primer + 2 paint | 2–4 hours |
| Chalk-style paint | Farmhouse aesthetics | 2–3 coats + wax | 1–2 hours |
For shiplap accents, use luan strips cut to 5-inch widths. Paint the edges before installation. Use a coin as a spacer for even gaps. Run continuous pieces for a modern look. Secure with a nail gun into studs.
“The right finish doesn’t just protect your build — it transforms furniture into a statement piece.”
These paint options and finishing ideas let you match any room’s decor. With your surfaces ready, you can add glass doors and hardware for a complete look.
Installing Glass Doors and Hardware Components
Now, your DIY fireplace TV stand will look like it came from a store. The glass door installation makes it shine. All your hard work will pay off.
Custom Glass Cutting and Retainer Clip Installation
Get your glass cut at Home Depot or Lowe’s. They’ll make sure it fits perfectly. Just remember to bring your measurements twice.
For the hardware, use glass door retainer clips. They keep the glass in place without any glue. This way, you can easily take out the glass for cleaning or a new design.
- Measure each door opening before heading to the store
- Request 1/8-inch thick glass for lightweight, secure fitting
- Space retainer clips evenly — about every 4 to 6 inches
- Test-fit each glass panel before locking clips into position
Creative Glass Treatment Ideas (Fabric Sandwich or Faux Mercury)
Plain glass is nice, but dressed-up glass is even better. Try the fabric sandwich method. Cut two glass pieces, add decorative fabric, and secure with clips. It’s a quick way to add style.
“Good design is making something intelligible and memorable. Great design is making something memorable and meaningful.” — Dieter Rams
For a vintage look, try faux mercury glass. Use Rust-Oleum Mirror Effect spray paint. It gives a mirror-like finish that hides cables.
| Treatment | Cost per Panel | Difficulty Level | Visual Impact |
|---|---|---|---|
| Plain Glass | $5–$10 | Easy | Clean, modern |
| Fabric Sandwich | $10–$18 | Moderate | Warm, textured |
| Faux Mercury Glass | $12–$20 | Moderate | Vintage, dramatic |
Each glass door installation adds a unique touch. Your hardware setup remains the same. Retainer clips work with all three styles.
Electric Fireplace Entertainment Center Plans for Different Rooms
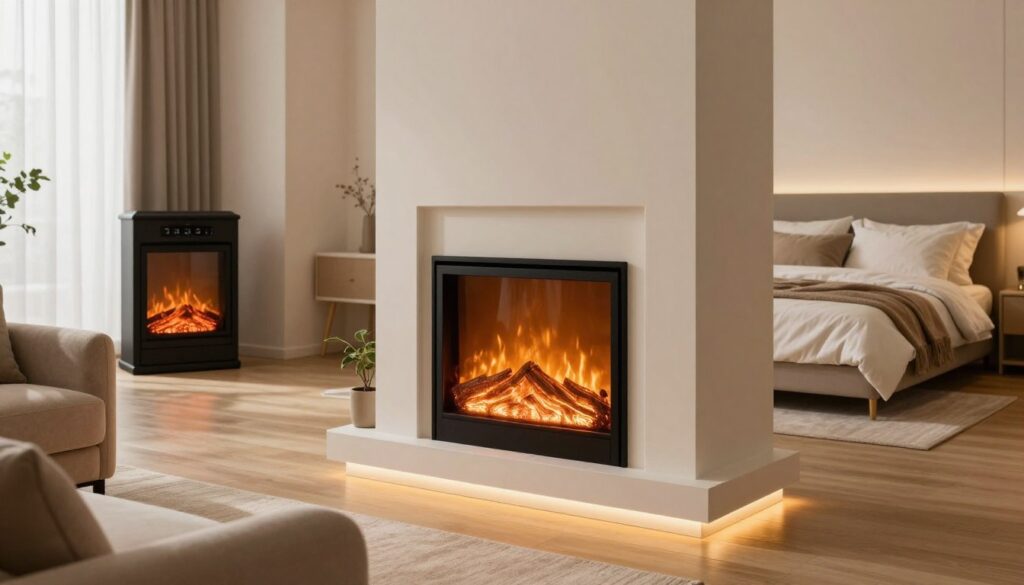
Your DIY build can fit in many places. I’ve tried different fireplace plans for three rooms, each with its own feel. The trick is to adjust your entertainment center to fit the room’s style and layout.
Living Room Focal Point Installation
The living room is where this build really comes alive. I placed mine on the longest wall, with seats facing it. The Touchstone AudioFlare black glass model is a great choice here. It has five flame settings, three colors, and Bluetooth speakers.
You can enjoy fire sounds without any logs.
Bedroom Cozy Corner Setup
For bedrooms, you need a smaller fireplace. I put a smaller version in a corner, making it my favorite reading spot. It heats up to 400 square feet, perfect for most bedrooms. Low blue flames and ambient sounds make it cozy without a heater.
Basement Entertainment Wall Transformation
My basement was cluttered with games and controllers. I used IKEA Kallax units on both sides of my fireplace to create an entertainment wall. This turned a storage area into a great place to hang out.
| Feature | Living Room | Bedroom | Basement |
|---|---|---|---|
| Ideal Width | 60–72 inches | 40–50 inches | 72+ inches with flanking shelves |
| Best Flame Color | Orange (traditional) | Blue (ambient) | Combo (party mode) |
| Heat Setting | High | Low | High |
| Bluetooth Speakers | Music streaming | Crackling fire sounds | Game day audio |
Every room needs a unique approach, but the build’s core remains the same. Choose the right size, place your entertainment center well, and let the flames do the rest.
Modern Alternatives: Shiplap and Built-In Fireplace TV Stand Building Tutorial
If you’re not into the traditional cabinet look, you’re in luck. Modern fireplace alternatives are all the rage. A shiplap fireplace build can turn your living room into a stunning focal point.
I started my shiplap fireplace build at the ceiling and worked my way down. This method lets the bottom strip fit neatly behind baseboards. It’s a smooth, polished finish. Trust me—it’s much easier than starting from the bottom.
Modern fireplace alternatives are perfect for this project. Here’s why:
- Small recessed lighting above shelves replaces bulky traditional sconces
- DIY picture ledges cut into three separate pieces flank the fireplace for easy display swaps
- A round brass mirror above the unit keeps things minimal—no farmhouse mantel needed
- Units like the AudioFlare can be wall-mounted or built directly into the shiplap
The AudioFlare line comes with all mounting supplies and helpful videos. You can plug it in or hardwire it for a cleaner look. The remote control lets you change flame styles and colors, making your mood lighting unbeatable.
| Feature | Plug-In Install | Hardwired Install |
|---|---|---|
| Difficulty Level | Beginner | Intermediate |
| Tools Required | Drill, stud finder | Drill, stud finder, wire strippers |
| Clean Look | Visible cord (can be hidden) | No visible wiring |
| Flexibility | Easy to relocate | Permanent placement |
A shiplap fireplace build with modern alternatives gives you a high-end look without the contractor cost. Ready to finish up? Let’s put everything together.
Conclusion
I began with a blank wall and ended up with a stunning centerpiece. My DIY fireplace TV stand project exceeded my expectations. It looks like it cost a fortune but actually didn’t.
It fits my space perfectly because I built it for my home. Not for some generic room imagined by designers.
The key to success in DIY projects is simple. Measure twice, use quality pocket screws, and take your time with the finish. Whether you choose a classic wood design or a modern tile look, the effort is the same.
You’ll create something that looks like it was custom-made. Not something you ordered online in the middle of the night.
My electric fireplace is a game-changer. It heats my room on cold mornings, late April nights, and in January’s chill. It’s not just beautiful; it’s functional too.
So, get your tools ready and start building. A fireplace TV stand like this is a rare DIY win. It looks expensive, works well, and impresses everyone who sees it. The best DIY tips always end with the same message: I didn’t buy it. I built it.
How difficult is it to build an electric fireplace TV stand if I’m a beginner woodworker?
What tools do I need for building a fireplace media console?
How do I choose the right electric fireplace insert for my custom TV stand?
Do electric fireplaces actually produce real heat, or are they purely decorative?
What type of wood should I use for my DIY media center with electric fireplace?
How do I frame the fireplace insert opening to support the weight properly?
Can I hide my cable box and electronics inside the TV stand instead of using open shelves?
Where can I get glass pieces cut for the doors on my fireplace TV console build?
What are the best finishing options for a woodworking electric fireplace cabinet?
Can this electric fireplace TV stand building tutorial be adapted for different rooms?
How do I create a modern shiplap look around my built-in electric fireplace?
Is it cheaper to build or buy an electric fireplace entertainment center?

giveitlegs@live.com
Contributing writer covering Honest reviews & buying help for fireplace TV stands and electric media consoles..