How to Build a TV Stand with a Fireplace Guide
Affiliate links — we may earn a commission
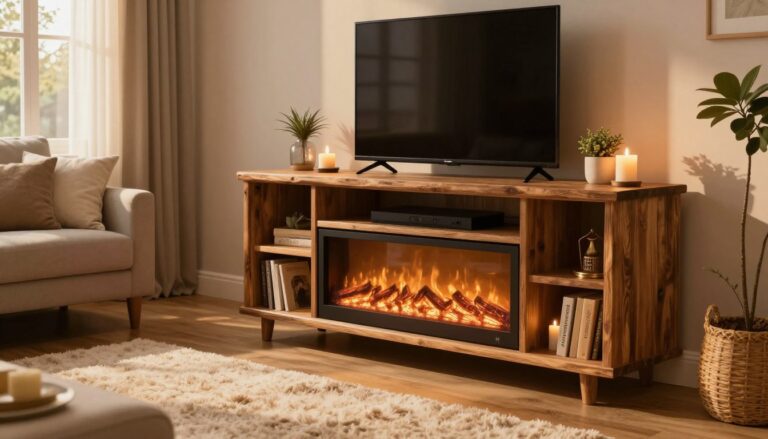
Last winter, I looked at my living room and felt it was missing something. The TV sat on a folding table, looking out of place. I wanted to make my apartment better, and I knew just how to do it.
I decided to build a TV stand with a fireplace. It was a big change for my home. Those fancy entertainment consoles were too expensive, so I chose to DIY instead.
The 72-inch unit I built is amazing. It has a cozy faux fireplace and holds your TV. You can add flameless candles or LED lights for a warm look. You’ll need just a few tools and materials from Home Depot or Lowe’s.
The best part is the hidden storage. It keeps your controllers, DVDs, and books out of sight. Once built, it fits easily against your wall. No need for complicated installation.
This guide will help you build your own fireplace TV stand. Even if you’re new to woodworking, you can do this. It’s simpler than it seems.
Key Takeaways
- Build a stunning 72-inch TV stand with fireplace using off-the-shelf lumber and basic tools for a fraction of retail prices.
- Skip pricey electric inserts — use flameless candles, LED lights, or lighted log sets to create a warm, inviting glow.
- Hidden compartments behind cabinet doors keep controllers, cables, DVDs, and books neatly out of sight.
- The finished DIY fireplace TV stand is perfectly sized to slide into place without permanent wall mounting.
- No advanced woodworking skills are needed — this project is beginner-friendly with clear, step-by-step instructions.
- Customization options let you match the unit to your existing décor, room size, and personal style preferences.
Planning Your DIY Fireplace TV Stand Project
Before I start, I need a clear plan. Skipping the plans is a sure way to waste a lot of money. Let’s go over the important decisions that will guide your project.
Choosing the Right Dimensions for Your Space
Measure your wall space twice. This is very important. Here are some standard sizes that fit most living rooms:
- Top width: approximately 57.5 inches
- Bottom width: approximately 52.5 inches
- Side height: approximately 39.25 inches
Make sure to leave 30–45 cm of space between the fireplace and TV edges. For the top, aim for 60–90 cm. These spaces keep your electronics safe from heat.
Selecting Between Electric Insert vs Faux Fireplace Design
When building an electric fireplace console, I always suggest an electric insert. Here’s why it’s a better choice:
| Feature | Electric Insert | Faux Fireplace (LED/Candles) |
|---|---|---|
| Installation Difficulty | Moderate | Easy |
| Flame Realism | High | Low to Medium |
| Heat Output Option | Yes (optional) | None |
| Cost Range | $100–$400 | $20–$80 |
Wood-burning fireplaces? Skip them. They’re not practical for a media center due to heat and humidity issues.
Determining Storage Needs and Hidden Compartments
Good plans include space for all your stuff. I design hidden spots on each side for extra storage.
Remember, keep the cabinet back open or well-ventilated. This ensures your electronics stay cool and last longer. With your plan ready, it’s time to choose the right materials.
Essential Materials and Tools for Building
Before I start, I need a solid shopping list. Building a TV stand with a fireplace insert requires specific materials. Skipping one item means an extra trip to the hardware store. I’ve learned that lesson the hard way.
Wood Selection: 1×12 Boards and Plywood Options
The heart of any homemade entertainment center is quality lumber. I’ll grab the following boards:
- Three 8-foot 1×12 boards for the main frame and shelving
- One 10-foot 1×12 board for larger structural panels
- One 10-foot 1×3 board for face frames and supports
- One 5-foot 1×6 board for internal dividers
- One 8-foot 1×2 board for trim and cleats
For the backing panel, I’ll choose a 4×8 sheet of quarter-inch plywood or paneling. It needs to be roughly 54″ x 40″. One sheet is enough.
Hardware Requirements: Screws, Hinges, and Brackets
No TV stand with fireplace insert construction holds together on good vibes alone. I’ll need 1.25-inch pocket hole screws for strong, hidden joints. Brad nails in both 1.25-inch and 1-inch sizes handle trim and panel attachment. Wood glue adds extra bond strength at every joint.
For the cabinet doors, I’ll use three sets of Euro Style concealed hinges. These are forgiving for DIY builders and look sleek once installed.
Finishing Supplies: Moulding, Trim, and Paint
| Supply | Size/Quantity | Purpose |
|---|---|---|
| Medium Crown Moulding | 8 feet (under 1.75″W x 2.5″H) | Top decorative edge |
| Base Moulding | 8 feet (5.25″ height) | Bottom footer detail |
| Wood Filler | One container | Filling nail and screw holes |
| Primer and Paint | One quart each | Protective, polished finish |
With these supplies ready, I’m set to start framing the basic structure in the next step.
How to Build a TV Stand with a Fireplace
This is where the sawdust starts flying. I love this part because your woodworking fireplace TV cabinet begins to take real shape. Grab your cut list, double-check your measurements, and let’s get building a 72-inch entertainment console that’ll make your living room the envy of the block.
Creating the Basic Bookshelf Frame Structure
I start with 1×12 boards to form the outer shell. The top piece runs 57.5 inches, the bottom stretches 52.5 inches, and each side stands at 39.25 inches tall. A Kreg Jig makes joining these pieces a breeze. If you don’t own one, 2-inch screws or brad nails paired with wood glue work just fine.
Here’s my step by step fireplace TV console cut list for quick reference:
| Piece | Material | Length | Quantity |
|---|---|---|---|
| Top | 1×12 Board | 57.5″ | 1 |
| Bottom | 1×12 Board | 52.5″ | 1 |
| Sides | 1×12 Board | 39.25″ | 2 |
| Outer Dividers | 1×12 Board | 33.75″ | 2 |
| Center Divider | 1×12 Board | 31.5″ | 1 |
Installing Dividers and Support Systems
Next, I attach two vertical dividers at 33.75 inches each. These create three distinct compartments inside the frame. A center divider at 31.5 inches adds extra rigidity. The top header is a 57.5-inch piece of 1×3, while the bottom header uses a 54-inch 1×3. For the footer, I cut a 54-inch piece from 1×6 stock.
Measure twice, cut once — and even then, you might need to measure a third time when building something this detailed.
Adding the Fireplace Opening and Surround
The center compartment is the star of the show. This opening serves as the fireplace surround for your woodworking fireplace TV cabinet. Size it to fit your chosen electric insert — most standard units need about 23 to 28 inches of width. Keep the framing square and snug so the insert sits flush. You’ll tackle doors and trim in the next steps!
Constructing the Cabinet Doors and Access Panels
A media stand without doors is just a fancy shelf. When you build your own media stand with heater, the cabinet doors make it look store-bought. This part is easier than it sounds.
Begin by cutting your side doors from 1×12 boards at 31 inches long. The middle flip-down door needs to be just a touch wider at 31.25 inches. This extra quarter-inch ensures smooth operation. To prevent warping, reinforce the flip-down panel with 1×2 boards along the back. Trust me, skipping this step will haunt you later.

For trim pieces, cut two side trims at 11.25 inches and one middle trim at 31.25 inches from 1×2 stock. Nail decorative moulding to the front of each door for a polished look. These are key fireplace TV stand building materials that elevate the entire build.
I recommend Euro Style concealed hinges for every door. They hide completely when closed, giving you that clean, seamless appearance that screams “I didn’t build this in my garage.”
Good doors don’t just look great — they protect your electronics, hide cable clutter, and keep curious kids away from your equipment.
| Door Component | Material | Size | Quantity |
|---|---|---|---|
| Side Doors | 1×12 Board | 31″ | 2 |
| Middle Flip-Down Door | 1×12 Board | 31.25″ | 1 |
| Side Trim Pieces | 1×2 Board | 11.25″ | 2 |
| Middle Trim Piece | 1×2 Board | 31.25″ | 1 |
| Concealed Hinges | Euro Style Metal | Standard | 6 |
With your doors hung and aligned, you’re ready to move on to the crown moulding and decorative trim. These will bring the entire project together.
Adding Crown Moulding and Decorative Trim Work
Trim work makes your DIY fireplace TV stand look like it came from Pottery Barn. Moulding is key to making it look professional. Now that your cabinet doors are in, it’s time to add some flair.
Installing Top Crown Moulding Details
Begin by adding a 1x board across the top for a base. This helps your crown moulding stick. Cutting crown moulding for a 57.5″ width can be tough. Use a miter saw at 45-degree angles for sharp corners.
Use both brad nails and wood glue to secure each piece. Glue is essential for a strong bond that lasts.
Applying Base Moulding and Footer Elements
The bottom needs as much attention as the top. Add 5.25″ base moulding for a classic look. An optional hearth platform can elevate your DIY TV stand:
- Use 1×8 boards for the base buildup layer
- Stack 2×6 lumber on top for height and depth
- Skip the cabinet base moulding if you go this route
Creating Professional-Looking Edge Treatments
Edge treatments complete the look. Decorative moulding from Lowe’s or Home Depot works well here.
| Trim Type | Best Location | Attachment Method |
|---|---|---|
| Crown Moulding | Top perimeter | Brad nails + wood glue |
| Base Moulding (5.25″) | Bottom footer | Brad nails + wood glue |
| Decorative Edge Trim | Face frame edges | Brad nails + wood glue |
With your trim in place, you’re ready for safety considerations when adding your fireplace insert.
Safety Considerations for Fireplace Integration
I wish I’d read this before starting my first project. Safety is key when building electric fireplace consoles. It makes all the difference between a cozy room and a big mistake. Here are the safety tips I’ve learned, some the hard way.
Maintaining Proper Clearance and Ventilation
Your fireplace media center plans need space to breathe. Keep 12 to 18 inches of space between the fireplace and any nearby TV or shelves. If you’re putting a TV above, make sure there’s 24 to 36 inches of space.
- Cut ventilation holes or slots in the back panel of closed compartments
- Never block the front or top vents of the electric insert
- Use open shelving near the fireplace opening to improve air circulation
Heat-Resistant Material Selection
Not all wood can handle heat well. For my projects, I use treated lumber, tempered glass shelves, and metal legs near the insert. Avoid using untreated MDF as it warps and discolors quickly. A heat shield or mantel between the fireplace and TV is a smart choice.
| Material | Heat Resistance | Best Use |
|---|---|---|
| Tempered Glass | High | Shelves near insert |
| Treated Plywood | Moderate | Surround panels |
| Untreated MDF | Low | Outer cabinet only |
Electrical Safety for Entertainment Components
Make sure all power cords are away from heat vents in your fireplace media center plans. I use cable management clips on the cooler panels. Don’t place soundbars or speakers on heated surfaces. Plug the fireplace and TV into separate surge-protected outlets for safety.
Safety isn’t about fear — it’s about building something you can enjoy for years without worry.
Customization Options and Design Variations
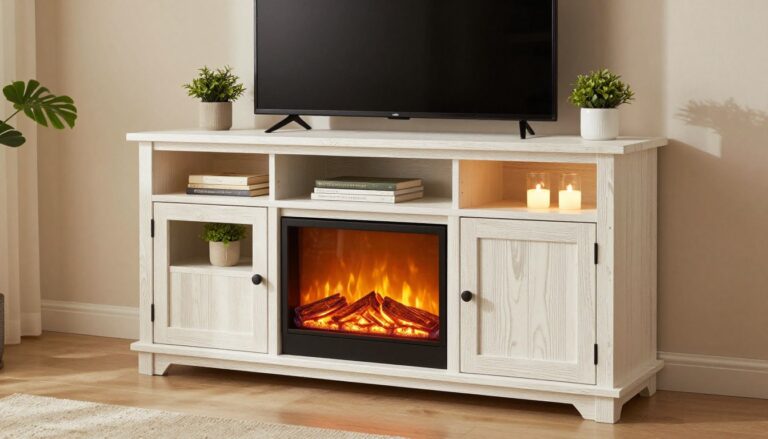
Now, the fun really begins. Your TV stand with fireplace insert doesn’t have to look like everyone else’s. This project lets you add your own personality to a piece of furniture.
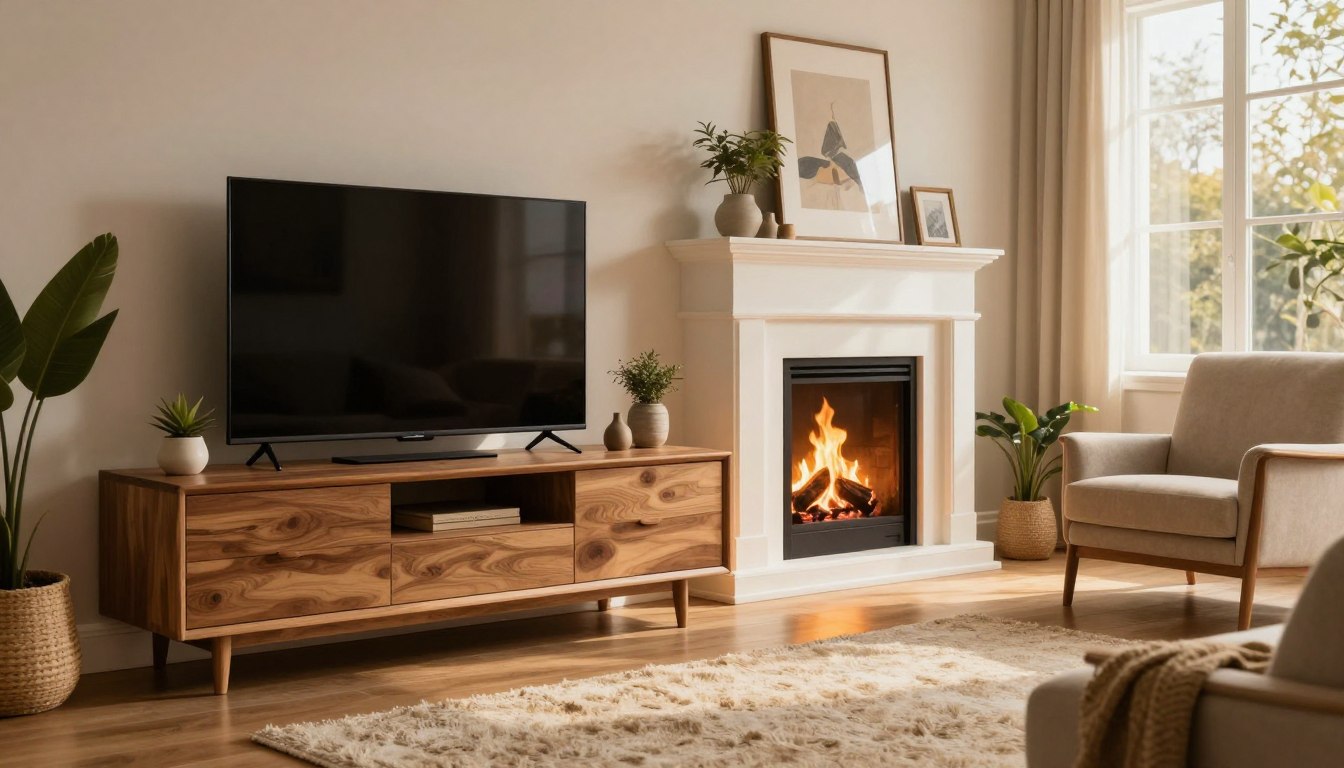
Choose a white or light wood finish for a coastal or Scandinavian vibe. For a moodier look, try a darker stain and black steel legs for an industrial feel. Your entertainment center should match your life, not clash with it.
In condos and apartments, space is key. A corner TV stand saves space while keeping things balanced. Units that combine a media console with a fireplace are great for small rooms.
A well-designed entertainment center does three things at once: it holds your tech, warms the room, and starts a conversation.
Before you decide on your design, keep these tips in mind:
- Match the unit’s width to your TV size for visual balance
- Check compatibility with your specific TV brand’s base or stand
- Add LED strip lighting behind the TV for soft ambient glow
- Consider childproofing features like soft-close hinges and rounded edges for family homes
| Design Style | Recommended Finish | Best Suited Space | Key Feature |
|---|---|---|---|
| Coastal | White or whitewashed oak | Beach house, open floor plan | Shiplap panel accents |
| Industrial | Dark walnut with black steel legs | City apartment, loft | Exposed metal brackets |
| Scandinavian | Light birch or maple | Small to mid-size living room | Clean lines, minimal trim |
| Traditional | Espresso or cherry stain | Formal family room | Crown moulding detail |
| Corner Unit | Any finish | Studio or condo under 300 sq ft | Space-saving angled back |
Once you’ve chosen your style, it’s time to install the fireplace insert or create a lighting effect that brings your piece to life.
Installing the Fireplace Insert or Alternative Lighting
Your woodworking fireplace TV cabinet is ready and looks great. Now, it’s time to make the firebox opening come alive. You have many options, from electric inserts to DIY tricks that look real.

Electric Fireplace Insert Installation Process
Electric inserts are easy to install in your step by step fireplace TV console. They just slide in, plug into a 120V outlet, and you’re ready. No need for a chimney or gas line.
Brands like Dimplex and Touchstone offer models with remote control and adjustable flame. Make sure you measured your opening right during planning.
| Lighting Option | Approximate Cost | Realism Level | Heat Output |
|---|---|---|---|
| Electric Fireplace Insert | $150–$400 | High | Optional (up to 5,000 BTU) |
| LED Lights with Firewood | $15–$40 | Medium | None |
| Flameless Candles | $10–$25 | Low–Medium | None |
| Lighted Log Set | $30–$80 | Medium–High | None |
Creating DIY Flame Effects with LED Lights
Want to save money? Use real firewood and LED string lights. The flickering lights look like a real flame, perfect for night.
“A fireplace doesn’t need real fire to steal the room. It just needs the right light.” — Emily Henderson, interior designer
Using Flameless Candles for Ambiance
Flameless candles are easy and safe. Place a few inside the opening. They flicker and glow without the risk of fire.
- Group candles in odd numbers (3, 5, or 7) for a natural look
- Use timer-equipped candles so they turn on each evening automatically
- Mix pillar sizes to add depth and visual interest
Choosing the right lighting for your step by step fireplace TV console adds ambiance. Next, I’ll show you how to finish it to look like it came from a store, but cheaper.
Finishing Touches and Surface Treatment
You’ve built the frame, installed the doors, and added gorgeous trim. Now, it’s time to make it look amazing. The finish is key when you build your own media stand with heater. Think of it as makeup for your masterpiece.
Wood Filler Application and Sanding Techniques
Begin by filling every single screw hole and imperfection with quality wood filler. Apply it generously, let it dry, and add another coat if needed. Patience is important here.
Once it’s dry, use 120-grit sandpaper to sand the entire project. Follow the wood grain direction. After sanding, vacuum all residue from every surface. Then, wipe everything down with a slightly damp cloth to catch remaining dust particles.
Priming and Painting for Durability
Before painting, apply a test coat on a hidden area. Check for color evenness and proper adhesion. Your fireplace TV stand building materials may absorb paint differently. A primer or wood conditioner creates a uniform base.
- Use a high-quality primer designed for your wood type
- Apply at least two coats of paint for rich, lasting color
- Allow proper drying time between each coat
- Lightly sand with 220-grit between coats for a glass-smooth finish
Applying Protective Coatings and Sealers
A protective sealer extends furniture life dramatically — essential near heat sources. When you build your own media stand with heater, heat-rated polyurethane or polycrylic adds a durable shield. Two to three coats of sealer give your fireplace TV stand building materials lasting protection.
A great finish doesn’t just protect your work — it transforms a DIY project into a piece that looks like it cost thousands.
Conclusion
Building a TV stand with a fireplace is a rewarding project. You’ll create a 72-inch entertainment center. It holds your big screen, hides clutter, and adds warmth.
This DIY project is easy to start. You need materials from Home Depot or Lowe’s. Just 1×12 boards, plywood, screws, and crown moulding are required. No fancy tools or woodworking skills are needed.
The best thing is, you can customize it. Change the paint color, hardware, or size. Just remember to follow safety rules. So, get ready to build something amazing without spending a lot.
How much does it cost to build a TV stand with a fireplace compared to buying one?
What are the standard dimensions for a homemade entertainment center with fireplace?
Do I need a Kreg Jig to build this fireplace TV cabinet?
How do I ensure proper safety when mounting a TV above the fireplace insert?
What type of fireplace insert works best for a DIY TV stand with fireplace insert construction?
What are the best inexpensive alternatives to an electric fireplace insert?
How do I build the cabinet doors for a fireplace media center?
What finishing techniques work best for a DIY fireplace TV stand?
Can I customize this fireplace TV stand for different room styles and sizes?
What hidden storage options can I incorporate into this build?
giveitlegs@live.com
Contributing writer covering Honest reviews & buying help for fireplace TV stands and electric media consoles..