
How to Build a Fireplace TV Stand Step by Step Guide
Affiliate links — we may earn a commission
Last winter, I was staring at my bare living room wall, wrapped in a blanket. I thought there must be a better way. My old TV stand looked like it belonged in a college dorm. Buying a fireplace TV stand from Wayfair or Pottery Barn was too expensive.
So, I decided to build one myself. Learning how to build a fireplace TV stand was a rewarding weekend project. It’s satisfying to create furniture that adds warmth and style to your home. It becomes the room’s centerpiece, where your family gathers on cold nights.
This guide will take you through every step, from measuring to turning on the electric fireplace. I’ve learned from my mistakes so you don’t have to. Whether you’re experienced or new to woodworking, having good plans is key. It makes the difference between a beautiful build and regret.
The modern fireplace TV stand is a key piece in American homes. It combines the cozy warmth of a fireplace with the function of a media console. With the right planning, tools, and safety precautions, you can make one that looks expensive but wasn’t.
Key Takeaways
- Building a custom fireplace TV stand saves hundreds of dollars compared to store-bought options from brands like Walker Edison or Twin Star.
- Accurate measurements and detailed DIY fireplace TV stand plans are essential before cutting a single board.
- Electric fireplace inserts from Dimplex or ClassicFlame are the safest and most practical choice for a DIY build.
- Proper ventilation around the insert is critical to prevent overheating and ensure long-lasting performance.
- Electrical safety — including surge protection and correct cable routing — should never be rushed or skipped.
- Knowing how to build a fireplace TV stand requires basic woodworking skills, patience, and attention to structural stability.
Planning Your DIY Fireplace TV Stand Project
Before I start, I sit down with a sketchpad and coffee. Planning is where the magic begins and mistakes are avoided. Getting your electric fireplace TV console right means focusing on the details before you cut wood.
Choosing the Right Dimensions for Your Space
I begin by measuring the wall and furniture. The size of your TV, ceiling, and room layout are key. A 55-inch TV needs a console at least 60 inches wide for balance. Leave 2–3 inches of space on each side of the fireplace insert.
| TV Size | Minimum Console Width | Recommended Height | Ideal Depth |
|---|---|---|---|
| 50 inches | 54 inches | 24–28 inches | 16 inches |
| 55 inches | 60 inches | 26–30 inches | 18 inches |
| 65 inches | 70 inches | 28–32 inches | 20 inches |
Selecting Between Electric and Traditional Fireplace Inserts
I prefer electric inserts for this project. The Touchstone Sideline 50 fits easily into a custom cabinet without venting issues. Traditional fireplaces need chimneys, gas lines, and a big budget. Electric units are safe, efficient, and cost little to run.
- Electric: safe, energy-efficient, easy to install
- Traditional: expensive, requires permits and professional installation
- Electric: no combustion byproducts or carbon monoxide risk
Determining Storage Requirements and Cabinet Layout
Think about what you’ll store — game consoles, streaming devices, vinyl records, or books. I like Jon Peters’ design: a fireplace on one side and open shelves on the back. It’s a stunning room divider. Planning your electric fireplace TV console with storage in mind prepares you for the next steps.
Essential Tools and Materials for Construction
Before starting your media center with fireplace, gather all tools and materials first. Remember, forgetting something like screws can really slow you down.
- Power drill with assorted drill bits
- Circular saw or table saw
- Tape measure and carpenter’s square
- Spirit level (because eyeballing it is never the answer)
- Screwdriver set (Phillips and flathead)
- Clamps for securing joints during assembly
- Safety glasses and ear protection
Make sure to get your electric fireplace insert before you start cutting wood. Read the instructions carefully. Each brand, like Touchstone, Dimplex, or Napoleon, has special rules for clearance and ventilation. Ignoring these can lead to big problems.
If you’re not comfortable with electrical work, consider hiring a pro. The fun part is building the woodwork. But, wiring mistakes can be dangerous.
| Material | Recommended Type | Estimated Cost | Purpose |
|---|---|---|---|
| Plywood sheets | 3/4″ birch or oak veneer | $45–$65 per sheet | Frame, side panels, shelving |
| Wood screws | 1-1/4″ and 2-1/2″ coarse thread | $8–$12 per box | Structural assembly |
| Wood glue | Titebond III waterproof | $9–$15 per bottle | Joint reinforcement |
| Electric fireplace insert | Touchstone Sideline 50″ | $400–$550 | Heat and ambiance |
| Sandpaper | 120, 180, and 220 grit | $10–$18 per pack | Surface preparation |
| Pocket hole jig | Kreg K4 or R3 | $40–$100 | Hidden joinery |
A well-stocked workspace is half the battle won — the other half is not losing your tape measure three times in one afternoon.
With your tools and materials ready, you’re ready to start framing your TV stand.
How to Build a Fireplace TV Stand Frame
The frame is the backbone of your project. It’s like the spine — get it wrong, and everything else falls apart. Before starting, I lay out every part and hardware on my garage floor. This saves a ridiculous amount of backtracking later.
Creating the Base Structure and Support System
I begin with the base platform from 3/4-inch plywood or solid hardwood boards. This base carries the weight of the TV, insert, and all your entertainment. I use a carpenter’s level at every step. Even a slight tilt will haunt you when mounting a 65-inch TV on top.
Secure the base rails with 2.5-inch wood screws, spaced about 8 inches apart. Pre-drill each hole to avoid splitting. Your fireplace entertainment center woodworking project needs a rock-solid foundation, so don’t rush this part.
Assembling Side Panels and Back Support
Next, I attach the side panels to the base using pocket-hole joinery. Each panel gets a 1/4-inch plywood backer for extra rigidity. I double-check alignment with a framing square before driving any screws home. A misaligned panel means crooked doors and uneven shelves down the road.
Installing Cross Braces for Stability
Cross braces are the unsung heroes of woodworking. I install at least two horizontal braces — one near the top and one at the midpoint where the fireplace insert will sit.
| Brace Location | Recommended Material | Screw Size | Purpose |
|---|---|---|---|
| Top rail | 1×3 hardwood | 2.5-inch | TV weight distribution |
| Mid-section | 1×4 hardwood | 3-inch | Fireplace insert support |
| Lower rear | 1×3 hardwood | 2.5-inch | Prevents frame racking |
With the frame complete, you’re ready to move on to constructing the fireplace insert housing — the real showpiece of this build.
Constructing the Fireplace Insert Housing
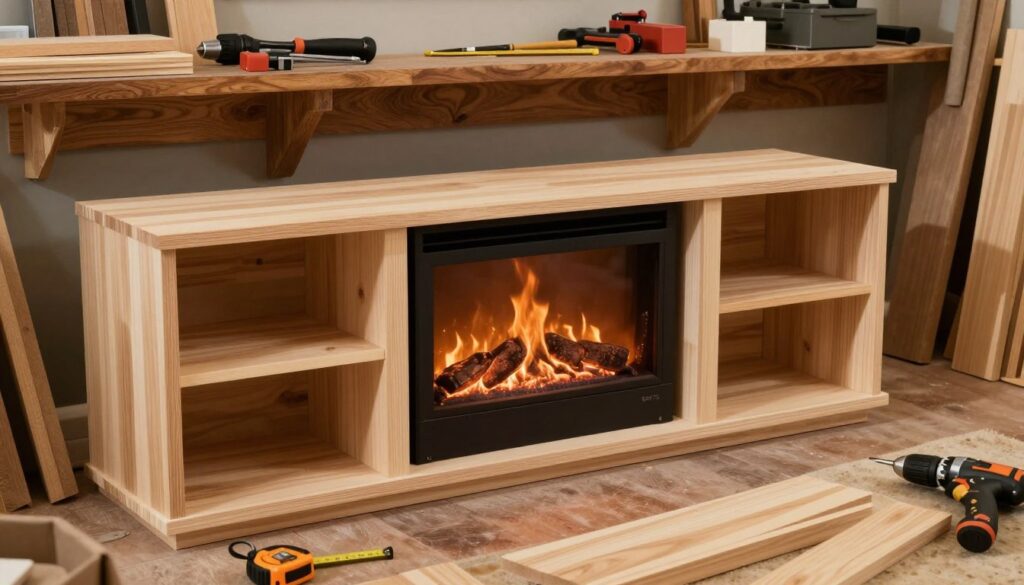
This part of the TV stand with fireplace insert tutorial is thrilling and a bit scary. You’re about to cut a big hole in the frame you built. It’s important to be precise, sturdy, and well-ventilated. I’ll guide you through each step to avoid a wooden box and regrets.
Measuring and Cutting the Opening
I start by checking the manufacturer’s specs. For example, the Touchstone Sideline has specific cutout dimensions. I mark the center of the front panel first. Then, I measure outward to keep the opening centered.
Measure twice, cut once is not just a saying; it’s essential. I use a jigsaw for the cutout after drilling starter holes. This ensures clean lines and tight tolerances.
Building the Recessed Box for Electric Insert
The recessed box is like a shallow cabinet inside your frame. I make mine from ¾-inch plywood, matching the insert’s depth plus an inch of clearance on each side. It’s important for structural support. The box must hold the insert’s weight without sagging.
“A well-built recessed box makes installation feel effortless. A poorly built one makes everything else a headache.”
I secure the box with wood glue and pocket screws. It’s anchored firmly to the frame’s cross braces.
Adding Ventilation Considerations
Electric inserts produce heat, which needs to escape. I never cover the vents. Here are my ventilation rules:
- Leave at least 3 inches of clearance above the insert
- Cut ventilation slots or install discreet grilles in the top panel
- Keep the back of the housing open or use perforated backing
- Avoid placing combustible materials within the clearance zone
Good airflow prevents overheating and extends the insert’s life. With the housing done, you’re ready to build storage compartments.
Building Storage Compartments and Shelving
Now, let’s get to the fun part of building your homemade fireplace TV cabinet. It’s time to add some serious storage. You’ll need places for your streaming devices, game consoles, and all those remotes.
Start by planning your compartments based on what you own. Measure your devices like soundbars and Blu-ray players. Make sure the openings fit them well, leaving some extra space.
Using adjustable shelving is a smart move. Drill holes in the side panels for shelves that can be moved. This makes your cabinet flexible for the future.
A great entertainment center doesn’t just hold a TV — it hides the chaos behind it.
If your cabinet is in the middle of the room, think about a dual-sided design. Shelves on the back turn it into a room divider. One side has your TV and fireplace, while the other has open shelving for books or plants.
| Compartment Type | Recommended Height | Best Use |
|---|---|---|
| Media Equipment Shelf | 6–8 inches | Streaming devices, cable boxes |
| Gaming Console Bay | 10–14 inches | PlayStation, Xbox, Nintendo Switch dock |
| Open Display Shelf | 12–16 inches | Décor, books, photo frames |
| Closed Cabinet | 14–18 inches | DVDs, board games, controllers |
With your storage sorted, you’re ready for the next step. That’s the electrical setup. Remember, careful planning is key here.
Electrical Setup and Safety Preparations
Now we get serious with the electrical part of building a fireplace media console. Electricity is serious business, and I want you to be careful. Always unplug your fireplace insert before touching any wiring. A surprise shock is not what you want from this project.
Running Power Cables Through the Cabinet
Before drilling, I plan out my cable paths. I run power cables along the back panel or through the base. Keep them away from heat sources, like the fireplace insert area. I use cable clips every 12 inches to keep things tidy.
Follow the instructions for connecting your electric fireplace insert to power. Label each cable with small tags. This makes changes easier later.
Installing Surge Protection and Cable Management
A good surge protector is essential. I install a six-outlet surge strip inside the cabinet near the back panel. It protects my TV, fireplace insert, and streaming devices from power spikes.
| Component | Recommended Spec | Purpose |
|---|---|---|
| Surge Protector | 1,080+ joules rating | Shields electronics from power surges |
| Cable Clips | Adhesive-backed, 12″ spacing | Secures wires along cabinet panels |
| Cable Labels | Color-coded tags | Easy identification for future adjustments |
| Grommets | 1.5″ to 2″ diameter | Clean pass-through points for cables |
Creating Access Points for Media Connections
I drill grommet holes in the back panel and between compartments. These holes let me run HDMI cables, USB cords, and antenna wires between shelves. Rubber grommets make each hole look polished and protect cables from wood edges.
With the electrical work done, you’re ready to finish the build. This will make it look like it came from a showroom.
Finishing Techniques for Your Custom Build
You’ve built the frame and wired the electrics. Now, it’s time to make it look like a piece from a furniture showroom. The finishing stage brings your custom fireplace TV stand to life. A rough box turns into a sleek centerpiece with the right techniques.
Sanding and Preparing Wood Surfaces
I start with 80-grit sandpaper to smooth out rough spots. Then, I move to 220-grit for a silky feel. Always sand with the wood grain, not against it. Wipe surfaces with a tack cloth between grits to remove dust.
This step is key to a professional look. It separates amateur builds from those that look like they belong in a showroom.
- Begin with 80-grit for heavy imperfections
- Move to 120-grit for general smoothing
- Finish with 220-grit for a polished surface
- Use a tack cloth or damp rag between each pass
Applying Stain or Paint Finishes
Choosing the right color depends on your room’s furniture and décor. I prefer Minwax stains for wood grain and Benjamin Moore paints for solid colors. Apply thin, even coats.
Two to three coats of polyurethane seal and protect your custom fireplace TV stand. This is important for durability and heat protection.
A great finish doesn’t come from expensive products — it comes from patience between coats.
Adding Decorative Molding and Trim Work
Crown molding and baseboard trim add a high-end look. I use a miter saw for clean cuts and attach with wood glue and brad nails. Trim work hides seams and frames your custom fireplace TV stand with detail.
Once the finish cures, you’re ready to install the electric fireplace insert in the next step.
Installing the Electric Fireplace Insert
This is my favorite part of the wood fireplace TV stand project. It’s when everything comes together. After hours of work, I slide in the electric insert and watch it come to life.
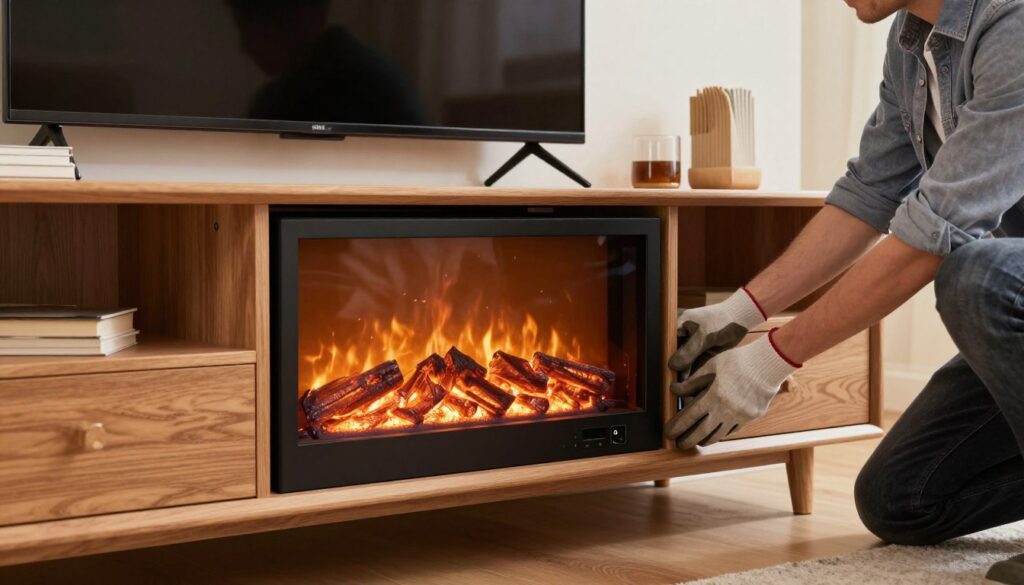
Start by lifting the insert and placing it in the recessed opening. It’s best to have someone help you. Make sure it’s centered so the gap is even on all sides. A crooked insert is a sign of “I winged it,” and nobody likes that.
Quality inserts, like the Touchstone Sideline series, fit easily into the cabinet opening. Use the manufacturer’s brackets and screws to secure it. This keeps it steady when the heater is on. Always check that the insert is flush with the front of your TV stand frame.
Next, plug the unit into the dedicated outlet you set up earlier. Remember these safety tips:
- Never use an extension cord — plug directly into a wall or built-in outlet
- Confirm the circuit can handle the insert’s wattage (most draw 1,500 watts on high)
- Leave at least 2 inches of clearance around vents for proper airflow
- Test the heater on low before cranking it up
After plugging it in, turn on the insert and play with the settings. Modern units have adjustable brightness, color, and heat controls. I spent 20 minutes just messing around with mine — no regrets.
A well-installed fireplace insert transforms a simple TV stand into the centerpiece of any living room.
With the insert in and working, your wood fireplace TV stand project is almost done. Next, I’ll show you how to mount your TV and finish the assembly.
Mounting Your TV and Final Assembly
You’ve almost finished your project. Your fireplace entertainment center is almost ready. The last 10% of the build is the most satisfying. Let’s mount the TV and get everything working.
Securing the TV Mount to Your Stand
Choose a mount that fits your TV’s VESA pattern and weight. A tilt-and-swivel mount is best for different viewing angles. Attach the brackets to the TV’s back first, following the guide carefully. Make sure to use a stud finder and reinforce the stand’s top panel. This ensures your TV stays put.
Organizing Cables for a Clean Appearance
A messy setup can ruin your fireplace entertainment center. Use Velcro ties, adhesive clips, and cord covers to hide cables. Route power and HDMI lines through the stand’s access points.
“A clean setup isn’t about hiding complexity — it’s about respecting the craft.”
- Group cables by function: power, audio, video
- Label each cable at both ends for easy troubleshooting
- Use a smart power strip like the TP-Link Kasa for remote control
Testing All Components and Connections
First, turn on the electric fireplace insert. Check for heat and any loose wiring. Then, turn on the TV and adjust the picture settings. I prefer Cinema Mode for better contrast. Test every input and connection. A few minutes now saves hours later.
Your project is done. Take a step back, enjoy a drink, and admire your work. Your fireplace entertainment center is ready for movie night.
Conclusion
Building a fireplace TV stand is a weekend project that makes every evening special. It only takes a few hours with a helper, and it looks amazing. You don’t need a chimney or worry about landlord issues, making it perfect for apartments everywhere.
After you finish your stand, a bit of care keeps it looking great. Check screws and bolts every few months because wood moves with the seasons. Also, inspect electrical parts, dust the inside, and clean the fireplace glass with a soft cloth. That’s all you need to do for a piece that does so much.
Now you know how to make a fireplace TV stand, and you have a custom piece for your living room. It adds warmth, style, and lots of storage. When guests ask where you got it, you can proudly say, “I made it myself.”
How long does it take to build a fireplace TV stand from scratch?
What are the ideal custom fireplace TV stand dimensions for my room?
Can I build a fireplace TV stand for my apartment?
What tools do I need for a fireplace entertainment center woodworking project?
How do I ensure proper ventilation when building the recessed box for an electric insert?
Where can I find free DIY fireplace TV stand plans?
What maintenance does a wood fireplace TV stand project require after completion?
Should I hire a professional or build my own media center with fireplace?

giveitlegs@live.com
Contributing writer covering Honest reviews & buying help for fireplace TV stands and electric media consoles..