
How to Build a TV Stand with Electric Fireplace Step by Step
Affiliate links — we may earn a commission
I was scrolling through Wayfair when I saw the prices for fireplace TV consoles. They were over $1,200. My wallet and living room felt cold and empty. I wanted that cozy warmth without spending a lot.
So, I grabbed a pencil and sketched a plan on a napkin. I thought, why not build one myself? That napkin sketch became a rewarding project.
Learning to build a TV stand with an electric fireplace changed my view on furniture. You don’t need to buy expensive, mass-produced pieces. All you need is a good plan and a weekend.
This guide shows you how to make a 72-inch traditional-style console. It will hold your TV, hide clutter, and add warmth. You can use flameless candles or LED-lit firewood for a similar look without the high cost.
I used off-the-shelf lumber and basic tools for my DIY project. No fancy workshop needed. I built it in my garage with a circular saw, drill, and lots of coffee. If I can do it, you can too.
If your living room needs a makeover or you want a meaningful weekend project, this guide is for you. Let’s get started.
Key Takeaways
- Building a 72-inch fireplace TV stand costs significantly less than buying a pre-made unit from retailers like Wayfair or Pottery Barn.
- You can complete this DIY electric fireplace TV console project with basic tools like a circular saw, drill, and tape measure.
- The design includes hidden storage compartments for controllers, DVDs, and books to keep your living room clutter-free.
- Affordable alternatives like flameless candles and LED firewood replicate the fireplace glow without expensive electric inserts.
- Off-the-shelf materials from Home Depot or Lowe’s are all you need — no specialty lumber required.
- This traditional-style console fits most living room layouts and supports standard TV mounting brackets.
Planning Your DIY Electric Fireplace TV Console Project
Before I start, I plan every detail. Good plans save time, money, and stress. Let’s go over the three big decisions you need to make before you start.
Choosing the Right Electric Fireplace Insert
Not all inserts are the same. I suggest the Touchstone Sideline 50 Electric Fireplace. It fits well in custom cabinets and looks great. It uses standard 120V power and heats rooms up to 400 square feet.
It’s perfect for electric fireplace media center projects because it’s slim and mounts flush.
Determining Your TV Stand Dimensions
Getting the measurements right is everything. Here are the standard dimensions I use:
| Component | Dimension | Purpose |
|---|---|---|
| Top Surface Width | 57-1/2″ | Supports TVs up to 65″ |
| Side Panel Height | 39-1/4″ | Comfortable viewing height |
| Bottom Panel Width | 52-1/2″ | Stable base support |
| Cabinet Depth | 16″ | Accommodates fireplace insert |
Deciding Between Double-Sided or Single-Sided Design
This is where things get fun. Designer Jon Peters popularized a double-sided design. One side shows the fireplace, and the back has open shelving. This creates a beautiful room divider.
A single-sided design is better against a wall. A double-sided build is great for open floor plans. Either way, your plans should make the unit portable.
With your plans ready, you’re set to gather tools and materials for the next step.
Essential Tools and Materials for Building Fireplace TV Stand Plans
Before I start, I gather every tool and material. It’s important to avoid a trip to the store mid-project. A good shopping list is key for a homemade TV stand with a fireplace.
For lumber, you’ll need standard boards. These are found at stores like Home Depot or Lowe’s. Always check the boards for warping, as it’s a major issue.
| Material | Size | Quantity |
|---|---|---|
| 1×12 Board | 8 feet | 3 |
| 1×12 Board | 10 feet | 1 |
| 1×3 Board | 10 feet | 1 |
| 1×6 Board | 5 feet | 1 |
| 1×2 Board | 8 feet | 1 |
| Crown Moulding (under 1-3/4″ W × 2-1/2″ H) | 8 feet | 1 |
| Base Moulding (5-1/4″) | 8 feet | 1 |
| 1/4″ Plywood (optional backing) | 4×8 sheet | 1 |
| Euro Style Concealed Hinges (non-mortise) | Per set | 3 sets |
You’ll need screws, nails, and wood glue. A Kreg Jig helps with strong joints, but it’s optional. Standard screws or nails with glue are a good alternative.
With your materials ready, you can start framing. I’ll guide you through that next.
How to Build a TV Stand with Electric Fireplace
Now it’s time to turn lumber into something magazine-worthy. This guide will help you build a fireplace TV stand step by step. We start with raw 1×12 boards and a Kreg Jig. Once the frame is up, you’ll feel like a true woodworker.
Creating the Basic Frame Structure
I cut my 1×12 boards to these exact measurements:
| Piece | Quantity | Length |
|---|---|---|
| Top Board | 1 | 57-1/2″ |
| Side Panels | 2 | 39-1/4″ |
| Bottom Board | 1 | 52-1/2″ |
| Outer Dividers | 2 | 33-3/4″ |
| Center Divider | 1 | 31-1/2″ |
Using the Kreg Jig, I drill pocket holes along the edges. These hidden joints make the structure clean and seamless. I attach the sides to the top and bottom boards first, forming a basic rectangular box.
Installing Interior Dividers and Shelving
The two outer dividers go in next, creating three distinct compartments. This is where your custom fireplace TV cabinet tutorial really takes shape. Each section has a purpose — side compartments hold media gear, and the center opens up for the fireplace insert.
The center divider is placed at 31-1/2″ to separate the fireplace area from any lower storage. I use pocket screws every 8 inches for maximum strength.
Adding Support for Your Electric Insert
The center compartment needs extra reinforcement. Electric fireplace inserts can weigh 50 pounds or more. So, I add a support cleat made from scrap 1×2 boards along the interior walls.
Measure your specific insert before locking in the center opening dimensions — a quarter-inch mistake means starting over.
With the frame assembled, you’re ready to move on to building the sturdy base platform. This keeps the entire structure grounded and level.
Constructing the Electric Fireplace Media Center Foundation
A solid foundation is key for a great electric insert TV stand design. It’s like laying the groundwork. Without a strong base, your media center will wobble. Here’s how to start your build on the right foot.
Building a Sturdy Base Platform
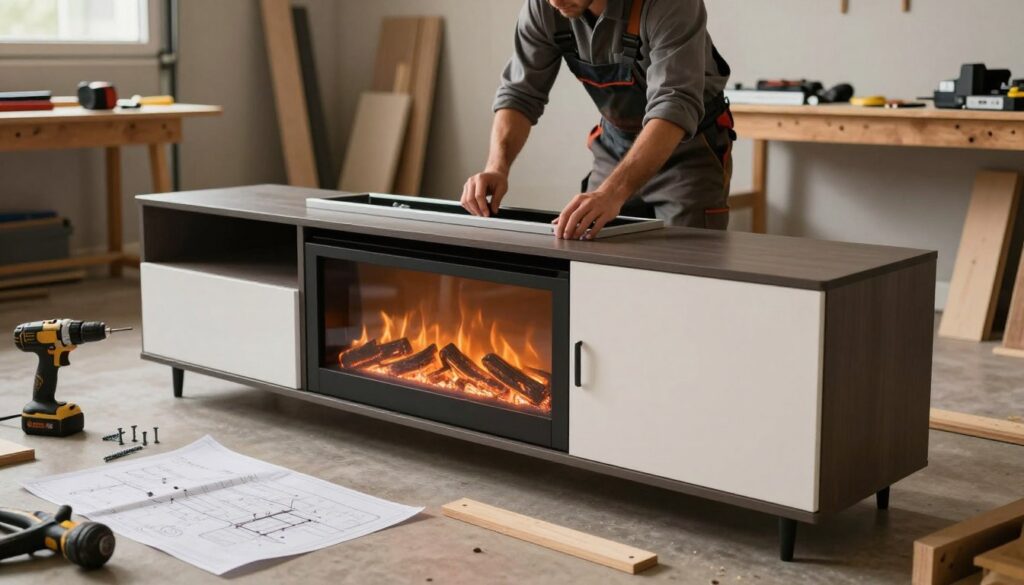
I like a raised hearth look for my builds. I use 1×8 boards for the platform base and 2×6 lumber on top for extra strength. This design skips the standard cabinet base for a more built-in look. The 52-1/2″ bottom piece is the solid foundation for everything.
| Component | Material | Dimensions |
|---|---|---|
| Base Platform | 1×8 Boards | Custom to unit width |
| Platform Top | 2×6 Lumber | Matches platform width |
| Bottom Piece | 1×12 Board | 52-1/2″ wide |
Assembling the Bookshelf Framework
The bookshelf framework uses 1×12 boards. They provide enough depth for media and books without being bulky. I build the vertical supports first, then add horizontal shelving to keep it square.
Securing Side Panels and Back Support
Side panels at 39-1/4″ tall keep the structure stable. The back is a 54″ x 40″ piece of 1/4″ plywood. This adds a lot of rigidity. A good guide will tell you not to skip the back panel for stability.
- Attach side panels with wood glue and 1-1/4″ brad nails
- Use a framing square to check every corner
- Secure the back panel with 3/4″ staples or small nails spaced every 6 inches
With the foundation set, you can move on to crown moulding and trim. These will make your piece look like it cost a lot.
Installing Crown Moulding and Decorative Trim Details
This is where your DIY electric fireplace TV console transforms. Trim work is what makes it look like it came from a showroom. Without it, the edges look bare and unfinished.
Begin by attaching the top header piece. I used a 1×3 board cut to 57-1/2 inches. The bottom header got a 54-inch 1×3 board. These pieces frame the console and support the crown moulding.
Now, the crown moulding installation becomes fun. A 5-1/4 inch base moulding wraps the console’s bottom. A 1×6 footer, cut to 54 inches, adds structural support and looks good too. Getting these cuts right is key when building a TV stand with an electric fireplace.
| Trim Component | Material | Length | Placement |
|---|---|---|---|
| Top Header | 1×3 Board | 57-1/2″ | Upper front edge |
| Bottom Header | 1×3 Board | 54″ | Lower front frame |
| Base Moulding | 5-1/4″ Stock | Cut to fit | Bottom perimeter |
| Footer Board | 1×6 Board | 54″ | Base front support |
For a clean finish on your DIY electric fireplace TV console, follow these tips:
- Use a miter saw set at 45 degrees for corner joints
- Dry-fit every piece before applying glue or nails
- Fill nail holes with wood filler and sand smooth
- Caulk gaps between moulding and the frame for a seamless look
With trim in place, your unit is ready for doors and storage. This is the next big step in your project.
Creating Storage Solutions in Your Homemade TV Stand with Built-in Fireplace
A beautiful fireplace console is great, but a messy living room is not. Smart storage makes all the difference. When I started planning my TV stand with a fireplace, storage was my main focus.
Designing Hidden Compartments for Controllers
Game controllers and remotes shouldn’t clutter your living room. I built doors that hide these items. The doors are designed to blend in when closed, keeping everything tidy.
Building Adjustable Shelving for Media Equipment
Interior dividers are essential for keeping your media center organized. I set dividers at 31-1/2″ and 33-3/4″ to separate zones. Here’s how I organized the storage:
| Storage Zone | Divider Height | Best Use |
|---|---|---|
| Center Section | 31-1/2″ | Streaming devices, sound bar |
| Left Side | 33-3/4″ | Gaming consoles, Blu-ray player |
| Right Side | 33-3/4″ | Books, vinyl records, board games |
Adding Cable Management Systems
I drilled holes in the back panel for cables. This keeps them hidden. A cable clip strip on the back wall helps manage wires neatly.
“The best furniture doesn’t just hold your stuff — it makes your stuff disappear.” — Bob Vila
These storage solutions make building a TV stand with a fireplace worthwhile. Now, it’s time to focus on the cabinet doors that will complete the design.
Woodworking Electric Fireplace Entertainment Center Doors
Doors are key to a project’s success. They are the “face” of your woodworking electric fireplace entertainment center. Your doors should look great and open smoothly every time.
“The difference between a good piece of furniture and a great one is in the details — and doors are the biggest detail of all.”
Crafting Side Cabinet Doors with Euro Hinges
I start with 1×12 boards cut to 31 inches for each side door. To add depth, I nail decorative moulding to the front. This simple step makes the doors look custom-made.
For the trim, I use 1×2 boards to frame each panel. This ties the design to the cabinet’s overall look, which you shaped with crown moulding earlier.
I use three sets of Euro Style concealed hinges per door. These hinges are surface-mount, so no routing is needed. They keep the doors flush and clean on your homemade TV stand with built-in fireplace.
Building the Center Flip-Down Door
The center door is 31-1/4 inches wide and flips down to show your media equipment. It needs strong support to avoid warping or sagging. I attach 1×2 support pieces on the sides and one across the middle.
Installing Soft-Close Hardware
No one likes a door that slams. I add soft-close dampers to every hinge. They cost just a few dollars each and make the doors feel premium.
| Door Component | Material | Measurement | Quantity |
|---|---|---|---|
| Side Cabinet Doors | 1×12 Board | 31″ | 2 |
| Center Flip-Down Door | 1×12 Board | 31-1/4″ | 1 |
| Side Reinforcements | 1×2 Board | 11-1/4″ | 2 |
| Middle Reinforcement | 1×2 Board | 31-1/4″ | 1 |
| Euro Concealed Hinges | Non-Mortise Surface Mount | Standard | 3 sets per door |
With your doors installed, you’re ready to add the finishing touches. These will complete your woodworking electric fireplace entertainment center.
Custom Fireplace TV Cabinet Tutorial Finishing Touches
This is my favorite part of any project — when raw wood turns into something fancy. Before you start painting, take a moment. Prep work is key to making it look expensive.

Begin by filling all screw holes, nail dimples, and gaps with wood filler. I recommend Minwax High Performance Wood Filler for its smooth texture. Make sure each layer dries completely before adding more. Rushing this step will lead to a bumpy finish.
After the filler dries, use 120-grit sandpaper to sand the whole piece. Always sand in the wood grain direction. Sanding against the grain can leave noticeable scratches under stain or paint. Remember, sand with the grain in this custom fireplace TV cabinet tutorial.
After sanding, cleaning is essential. Here’s how I do it:
- Vacuum every surface, including crevices and shelf interiors
- Wipe all surfaces with a slightly damp lint-free cloth
- Wait 15 minutes for any moisture to evaporate
Before applying a full coat, test your finish on a scrap or hidden spot. This checks color accuracy and adhesion without ruining your work.
A good primer isn’t optional — it’s the secret weapon behind every professional-looking build.
Apply a wood conditioner for stain projects or a quality primer like Zinsser BIN for paint. This step ensures your fireplace TV stand looks polished and even. Once the finish is dry and cured, you’re ready for the final assembly stage.
Step-by-Step Fireplace TV Stand Build Final Assembly
This is the moment I’ve been waiting for — snapping all those pieces together like the world’s most satisfying puzzle. Your electric insert TV stand design is about to come to life. After all that cutting, sanding, and finishing, the final assembly stage is where the magic happens. Let me walk you through each step so nothing gets overlooked.
Mounting the Electric Fireplace Insert
I start by sliding my Touchstone Sideline 50 into the prepared cabinet opening. The fit should be snug but not forced. I leave at least one inch of clearance on each side for airflow. This fireplace console table building guide wouldn’t be complete without stressing this: never block the vents. Restricted airflow creates heat buildup, and that’s a safety hazard nobody wants.
I secure the insert to the frame using the manufacturer’s included mounting brackets. A few screws, a level check, and the unit sits perfectly flush with the front face.
Securing the TV Mount Bracket
Next, I attach the TV mount bracket to the reinforced top section. Before drilling, I verify the weight capacity matches my television. Here’s a quick reference I use:
| TV Size | Approximate Weight | Recommended Bracket Capacity |
|---|---|---|
| 50 inches | 28–35 lbs | 50 lbs minimum |
| 55 inches | 33–40 lbs | 60 lbs minimum |
| 65 inches | 42–55 lbs | 75 lbs minimum |
I always exceed the minimum by at least 15 pounds. Better safe than sorry when expensive electronics are involved.
Testing Electrical Components and Ventilation
Before rolling this beauty into its forever spot, I test every electrical component. My checklist includes:
- Flame display on all color settings
- Heating function at low and high levels
- Remote control responsiveness
- Ventilation airflow with a tissue test near exhaust areas
The best part of this electric insert TV stand design? It’s an all-in-one unit. I can roll it into position without calling for backup. With this fireplace console table building guide wrapped up, the finishing touches from the previous section are about to shine in your living room.
Conclusion
Building a TV stand with an electric fireplace is a project that’s way more impressive than it seems. You end up with a wide entertainment center that looks expensive, but it didn’t cost much. Woodworking is amazing because it turns simple materials into something truly impressive.
This DIY project gives you hidden storage, adjustable shelves, and a cozy fireplace glow all in one. You can also customize it to fit your space perfectly. Want a raised hearth or a double-sided room divider? This build supports your creativity.
This is a great project for those who are a bit more experienced. It challenges you just enough to keep it fun. From framing to adding crown moulding and soft-close doors, each step builds on the last. So, grab your tools, choose your wood, and start building. Your living room is about to get a big upgrade.
How difficult is it to build a TV stand with electric fireplace if I’m not an experienced woodworker?
What electric fireplace insert works best for a DIY electric fireplace TV console?
What are the exact dimensions I need for this electric fireplace media center construction?
What materials do I need for this homemade TV stand with built-in fireplace?
Can I build this fireplace console table as a room divider?
Do I absolutely need a Kreg Jig for this woodworking electric fireplace entertainment center?
How do I ensure proper ventilation when mounting the electric fireplace insert?
How much money will I save compared to buying a pre-made electric fireplace TV stand?
What’s the best way to finish and sand this project for professional results?
Can I modify the design to include a raised hearth platform?

giveitlegs@live.com
Contributing writer covering Honest reviews & buying help for fireplace TV stands and electric media consoles..